A shower diverter valve is a mechanism that allows switching the flow of water between the tub faucet and the shower head. When you pull up the knob or lever on your tub spout, the diverter valve redirects the water to exit the overhead shower.
However, over time, specks of dirt clogs, mineral build-up, or loose or worn-out parts can cause your shower diverter stuck in one position.
If clearly saying, a sticking diverter is usually caused by a lack of maintenance. Hard water, loose parts, or no lubrication for a long time seizes up the valve internals and prevents smooth operation.
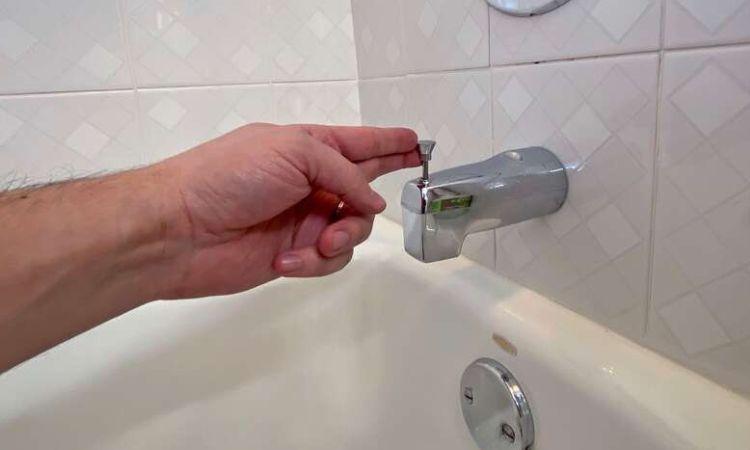
But you are not alone here. Most often, I personally dealt with the issue by cleaning the valve and replacing the worn-out parts.
Let’s dive right in to get other effective solution ideas.
Table of Contents
Possible Reasons & Solutions For Why Your Shower Diverter Won’t Pull Up Or Go Down [Quick Overview!]
Before heading over the details, let’s have a quick glimpse at all the probable reasons why your shower diverter is stuck with the recommended fixing ideas:
| Probable Reasons | Recommended Fix |
| Clogged diverter valve | > Clean out the dirt or grime build-up from the valve connection |
| Mineral buildup in the valve | > Use vinegar solution and clean out the scale build-up from the valve body |
| Lack of lubrication | > Apply any of the water-resistant spray lubricants and decrease the friction between the moving parts of the diverter valve. |
| Loose or worn-out components | > Inspect the valve component for the loose connection. Tighten it or if required, replace the worn-out parts. |
| Defective diverter valve | > Replace the defective diverter valve. |
Troubleshooting A Stuck Shower Diverter [The Detailed Fixes For A Smooth Flow]
Dealing with a malfunctioning shower diverter valve, especially when it is stuck and won’t redirect water flow can be extremely frustrating. But wait! Don’t tear out that stubborn valve just yet!
In many cases, some simple troubleshooting and targeted fixes can get your diverter working smoothly again.
Here is all for you! Let’s dive into diagnosing and repairing that troublesome sticking diverter valve once and for all!
1. Clogged Diverter Valve Or Tub Spout
Let’s begin with the easiest! If your shower diverter valve is stuck in one position, then it can be clogged up with hair, soap scum, debris, or other foreign matter.
While in operation, it is not uncommon that hair and debris can make their way into the valve and create clogs. Even several times I noticed the same!!
This prevents the internal switching mechanism of the valve from moving freely to redirect water flow and lock into one output position. Don’t worry! The issue is quite easy to deal with. Here you go!
How To Fix:
First up you will have to remove the stuck clog. For instance, use a small wire brush or bottle-cleaning brush and scrub the valve to remove the clog.
To dislodge any stuck dirt, insert a blunt wood or plastic dowel into the diverter opening and lowly twist and move up and down to remove it.
Another thing you can do is aim a detachable showerhead into the tub spout opening while running hot water. The strong spray can help flush out debris and you will get your diverter valve moving freely.
In case you suspect blockages in the tub spoon, the ideal solution is to fully disassemble the tub spout and thoroughly clean all internal passages and parts. For instance:
- Disassemble the spout according to its installation mechanism.
- If it is screwed on, remove the screw and pull out the spout by twisting it back and forth.
- For a spout threaded directly onto a pipe nipple, you may need a pipe wrench or pliers to unthread it.
- Once you disassembled, use an old toothbrush and scrub away stubborn gunk from the spout inside. If there is significant mineral buildup, you can soak it in vinegar or lime remover.
Keep on reading our later parts to know how vinegar solutions are effective in freeing up any stuck plumbing fixture like a diverter valve.
2. Jammed With Grime & Scale Build-up
If your shower diverter won’t pull up or down at all, another possibility is the diverter valve is jammed with grime and scale build-up.
Even it is a common phenomenon in the hard water area where people often deal with stubborn minerals build up throughout their plumbing system.
Actually, when hard water flows through plumbing fixtures the mineral contents from it accumulate on the metal parts on the diverter valve and settle down. Over time, the accumulated minerals form a hard, crusty deposit which reduces the valve movement and makes it squeaky at one position.
In this instance, you may notice grating noises coming from the diverter valve when you’re trying to pull it up.
How To Fix:
Dealing with a stubbornly stuck shower diverter due to corrosion or scale build is enough challenging. Here I am providing some tricky tips from my hands-on experience you can apply them here:
Method 1: Applying Vinegar Solutions
It is the most effective process to dissolve the scale or limescale build-up. Vinegar has a mild acidity that makes it effective in breaking down mineral deposits without causing damage to the surfaces which it comes into contact with.
Anyway, here is a simple method to apply vinegar to your plumbing system.
- First off, prepare the vinegar solution. Mix equal parts white vinegar and water in a bowl or a container.
- Then pour the solution into a plastic sandwich bag until it’s about halfway full.
- Now carefully place the open end of the bag over your tub sprout, making sure the solution submerges the spout.
- Take a rubber band or zip tie and secure the plastic bag in place like in the image below:
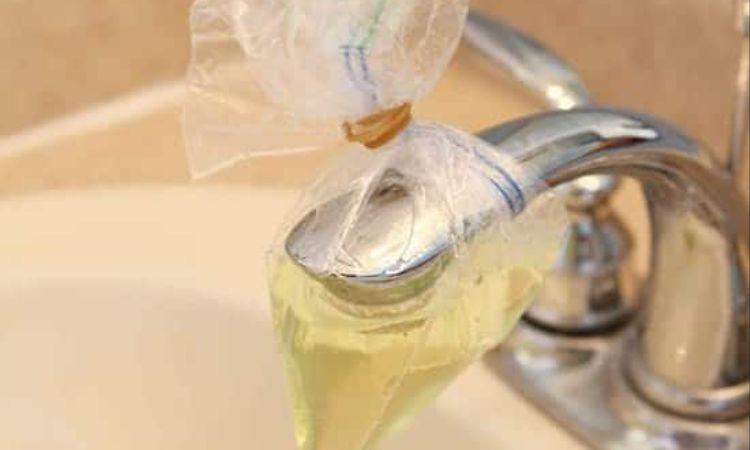
Wait for several hours or overnight to allow the diverter valve to soak in the vinegar solution. The vinegar will work to dissolve the scale deposits during this time.
When done, remove the plastic bag and try to pull up the diverter valve.
Method 2: Commercial Descalers
You can use commercial descalers here like CLR, Lime-A-Way, and Viakal to descale a diverter valve with severe mineral buildup. But make sure the descaling product is suitable for plumbing fixtures.
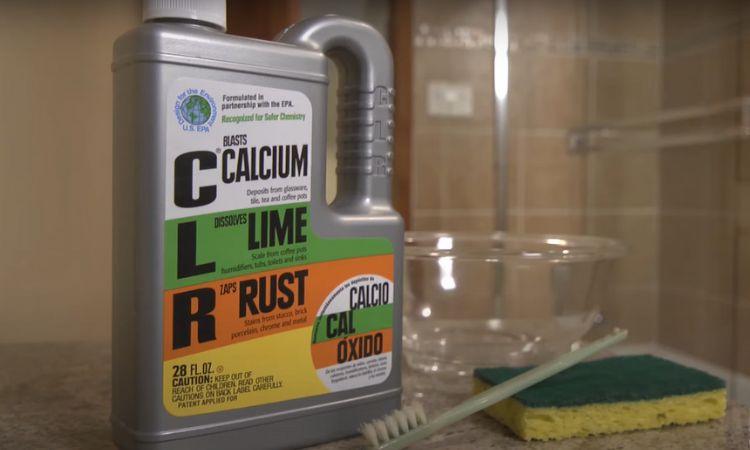
For instance, you can follow the instructions product instructions for application and safety. If it is all okay, simply apply the descaler solution, diluted with water over the diverter valve.
Wait for the specified time, and then rinse thoroughly. The chemicals in the descaler will help you break down and dissolve mineral deposits effectively.
Method 3: Apply Home Remedy
If you don’t have vinegar or any descaler right at that moment, you can have lemon juice as well. Lemon juice contains citric acid which can help you to dissolve mineral deposits, including limescale.
Simply apply the lemon juice solution directly to the areas with mineral deposits and wait at least 15-30 minutes. Then use a soft brush or toothbrush and gently scrub the stubborn deposits.
Finally, rinse with clean water and remove the remaining loosened deports. Now pull up the diverter valve. Hope this works!
3. Lack Of Lubrication
Proper lubrication is extremely important when it is all about maintaining metal plumbing parts and fixtures. That same goes for your diverter valve button that is in continuous operation by pressing and releasing.
So, any sticking or resistance-filling issue with your valve when trying to redirect the water is a sign of a lubrication issue.
Without lubricant between the surfaces, hard water scale and metal parts directly rub against each other leading to increased friction.
The friction mainly goes up due to excessive dryness from corrosion or mineral build-up, which you even can’t resolve with the vinegar solution.
Don’t worry! get some lubricant oil and see the magic.
Proper lubrication always proves as a secret dose here to maintain the metal part of your shower valve system and extend its lifespan. So let’s try it !!
How To Fix:
Before doing anything, make sure you have followed our previous instructions to clean out the debris and grime from the valve body. The oil will not properly reach and coat the metal surfaces since they are already coated in mineral deposits and soap scum.
So clean the surface first! Wipe it down with a clean, damp cloth.
Now: Take any of the water-resistant spray lubricants. For instance, You can use the WD-40 or simply basic cooking oil that you use daily.
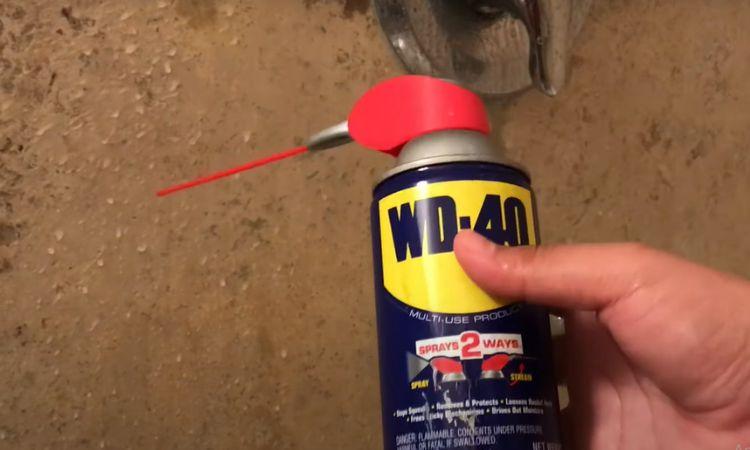
Now apply a small amount of the oil on the moving parts of the diverter valve. Focus on areas where friction occurs, such as the stem or any sliding components.
If possible try to move the diverter mechanism back and forth to ensure the lubricant is distributed evenly. This will help you to coat all moving parts for smoother operation.
Let it sit for up to 15-30 minutes and you will get the diverter valve button back in operation.
[Note: Avoid over-lubricating as it is wasteful and most importantly can result in excess residue around the diverter valve and its surroundings.]
4. Loose Or Worn-out Internal Components
Let me share my personal experience now regarding the same fact. Last weekend, I was almost ready to shower up and pull up the diverter button to let the water from my shower head.
Unfortunately, it was stiff and seemed quite impossible to move. I tugged and twisted the diverter button again but it barely budged.
Upon closer inspection, I noticed the valve body itself was slightly askew. Some of the mounting screws had become loose causing the whole diverter assembly to shift.
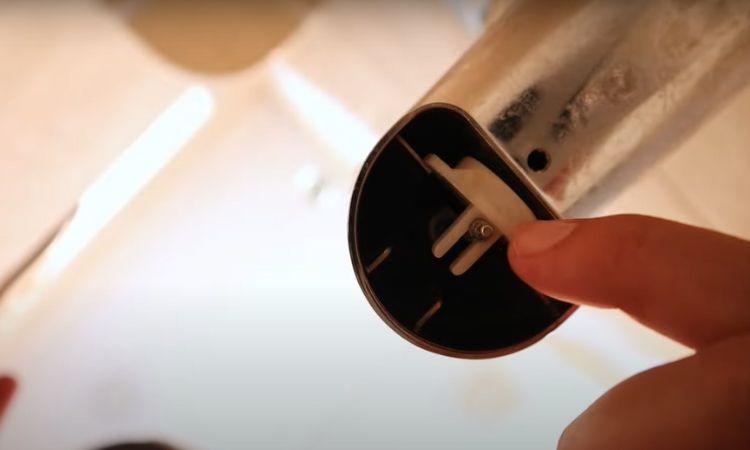
I turned off the water supply and disassembled the valve where I saw the loose mounting was causing the gate stem to bind against the body rather than slide smoothly.
Also, the worn-out rubber O-ring also looked to be leaking. So that’s my case.
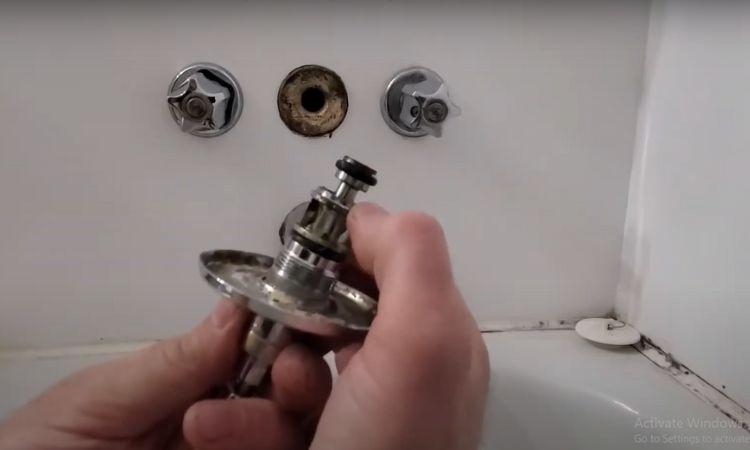
If still you are dealing with a stiff shower diverter valve, the best possibility is any of the internal components are loosened or worn-out out, preventing the valve from proper operation.
How To Fix:
As described, you will have to disassemble your shower diverter valve and inspect for any loose components.
[If you are new to this, keep on reading where I’ve described the complete disassembling process of the diverter valve]
Tighten the loose component and re-align it back to its connection. Also, look for worn-out or damaged parts and replace them.
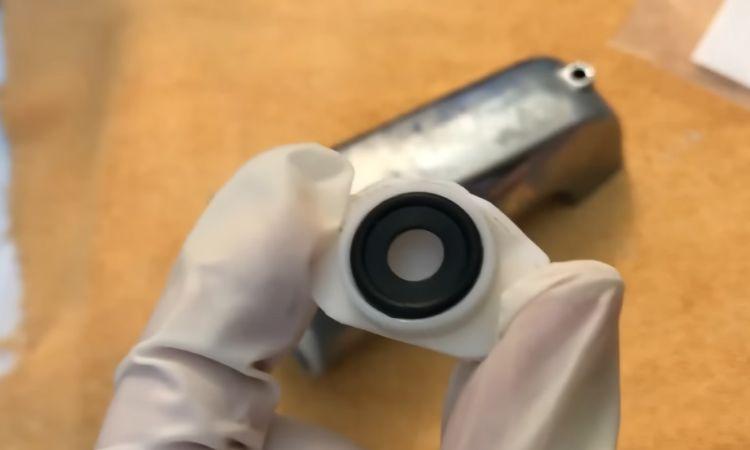
In case of leaking O-rings, the below video is going to be much more effective for you. Have a look!
5. Defective Diverter Valve Or Spout System Itself
Well if you have completed the cleaning and lubrication session to deal with the stuck shower diverter valve with your bathroom fixture.
Even if you have tried fixing the loose component or replacing the damaged part. If still the same case, it is more likely related to a defective valve or tub spout.
Yes, you got it right! A defective or faulty tub spout can certainly cause issues with the shower diverter valve getting stuck in one position.
Here the the tub spout may be warped or bent which is not properly engaging the diverter gate or stem, and preventing it from shifting positions.
In most cases, poor quality substandard plastic spouts cause this issue. Cracks or leaks in the tub spout allow water pressure to force the diverter components out of alignment.
This results in the diverter scraping and binding rather than sliding smoothly.
Whatever the fact, it is quite easier to replace the defective tub spout even if you are not technically knowledgeable. Here I am going to share the the easiest tips and tricks to disassemble and install the new tub spout. Here you go!
How To Replace Shower Diverter Valve Or Tub Spout?
Supplies Needed:
- New diverter valve kit
- Adjustable wrench
- Pliers
- Teflon tape
- Rag
Follow the step-by-step below accordingly:
Step 1: Turn off The Water Supply
Start by turning off the water supply to your shower system. Locate the shut-off valves of your house and turn them clockwise to shut off the water.
Step 2: Cover The Drain
In this step, cover the shower drain with a rag, tape, plug, or stopper. It will critical tools from disappearing or falling down the drain.
Step 3: Remove The Spout
Now disassemble the tub spout holding the diverter valve from the connection. For instance, take a putty knife or razor and Remove any caulking around the tub spout.
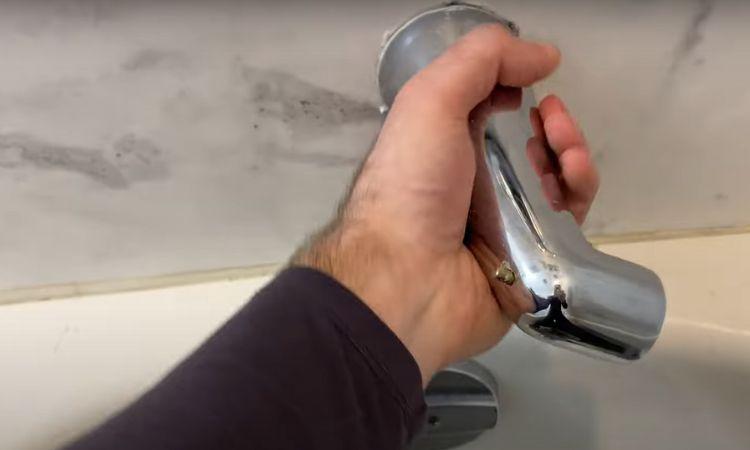
Now, look for a hex nut or screw on the underside of the tub spout and remove it using a hex key or screwdriver.
After that gently twist the spout counterclockwise until it is removed from the brass adapter. Then pull it out. If required, use an adjustable wrench.
Step 4: Remove The Diverter Valve
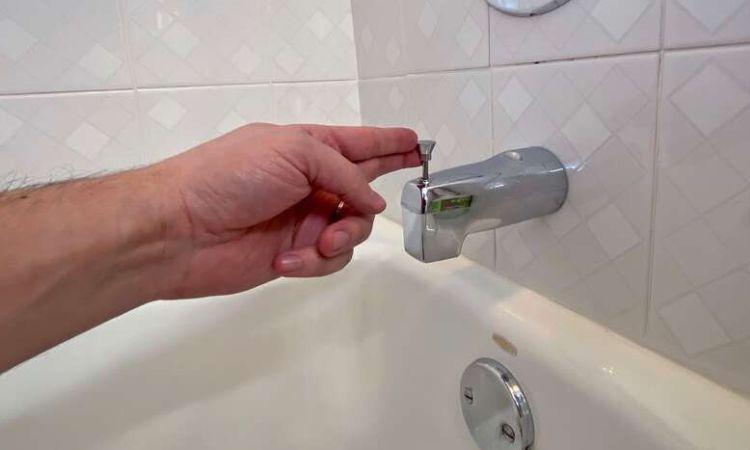
At this stage, locate the diverter valve on the spout which you will need to remove. It is simply a little pin that slides up and down. Use a pliers and take the the diverter apart with a gentle force.
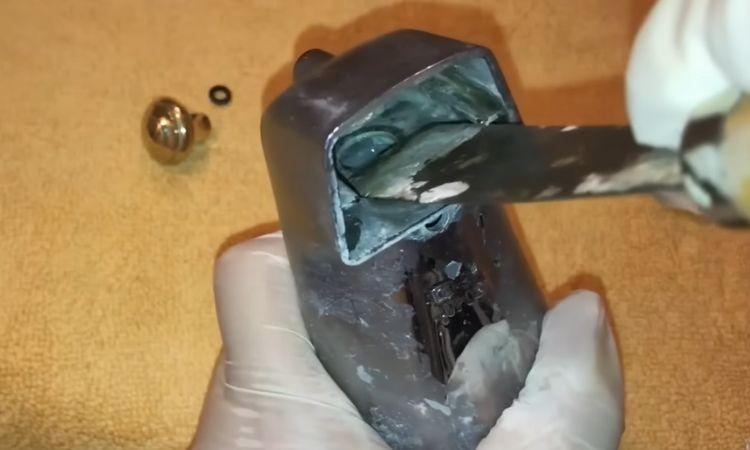
Pry out the rubber washer and other internal parts. If needed, scrape away the gunk build-up inside the spout.
It will help you enough with the smooth operation of the diverter valve and the strong flow of the water.
Step 5: Install The New Diverter
Now bring the replacement parts of your diverter, making sure it is matched to your tub spout system. If so, slide the valve back to its connection and push the knob through the opening of the tub sport at the top.
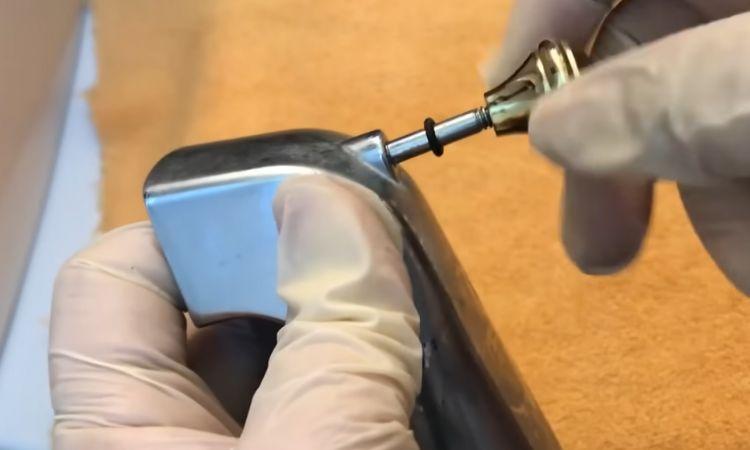
Reassemble the other parts in the kit. If required, read the instructions in the manual.
Step 6: Reinstall Your Tub Spout
Finally, reinstall your tub spout. Before that, remove the old plumber’s tape from the threading on the pipe. Take a new tap and wrap up to 4-5 layers of it around the threading of the pipe.
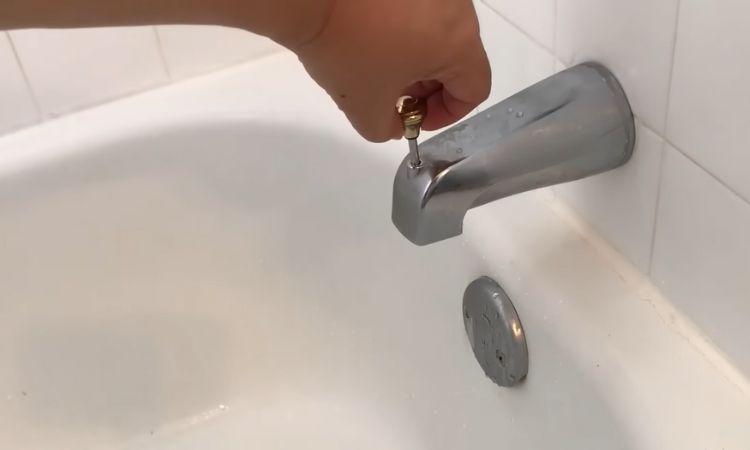
When done, slide the spout back into the connection and twist it counterclockwise until it is tightened enough. Now turn on the water supply and test the valve operation.
If it opens and closes without any distractions, congratulations. You have done it!
Note: In most cases, you may need to replace the entire tub spout assembly., Don’t worry! It is not too expensive and you can expect to pay up to $20-80 for the replacement part.
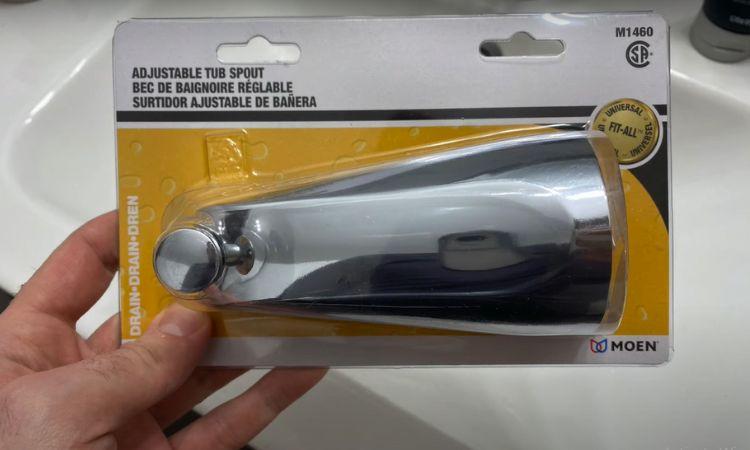
For any confusion, I’m referring to the effective video below that helped a lot in my case as well:
Preventing Your New Shower Diverter From Sticking In The Future [Learn Quick Maintenance Tips!]
If you don’t allow a stubborn diverter to stop your shower enjoyment in the future, here are a few maintenance tips that you can ensure in this instance:
1. Periodically Cleaning:
Periodically inspect your diverter valve and even the whole shower system for any blockages and clean the shower diverter system thoroughly.
In case you have hard water in your house and mineral build-up is very common to you, use a descaling spray or vinegar soak every few months to dissolve mineral deposits before they build up.
You can install water softening systems as well to reduce scale forming in your home plumbing system.
2. Secure Connections:
While doing the cleaning session, make sure you haven’t disturbed the mounting bolts and pipe fittings to avoid looseness. All should be secured in place.
3. Regular Lubrication
It’s a good practice to lubricate the moving parts of the plumbing system. It will help to prevent wear and tear while you are using it. Apply silicone grease or any other publication oil every 1-3 months in the valve.
4. Avoid Excessive Handle Force
Be delicate while using the diverter lever. Avoid excessive handle force that may strain the parts
5. Regular Inspection for Any Damage
Regularly inspect the valve for any worn rubber washers and O-rings. Replace them if needed.
FAQs:
How much does it cost to replace a shower diverter valve?
The overall cost to replace the shower diverter valve ranges between $225 to $575, including the labor and material costs. The average cost of the replacement material would be $20 – $200.
Can I replace the defective shower diverter valve by myself?
Yes, with proper preparation and by following the manufacturer’s instructions, you can replace a faulty shower diverter valve by yourself. Just be sure to use the right replacement parts matched to your existing plumbing system.
Why won’t my shower diverter redirect water between the tub spout and the shower head?
When a diverter valve is stuck, it fails to properly slide or rotate internally to change the water flow path. This leaves it stuck sending water only to the tub or only to the shower head.
Why is my shower diverter leaking while in operation?
The shower diverter leaks mainly when there is a loose connection between the faceplate. Also, improper water pressure. A clogged tub spout, improper installation, or broken internal parts cause it to leak.
Why does my diverter valve move but water doesn’t change from tub to shower?
The diverter stem may be worn out or the knob detached from it. This allows the lever to move freely without engaging the valve internals.
Why does my shower diverter partially move between positions?
If your shower diverter lever partly moves but still seems stiff, it would be related to corrosion build-up in the valve body. prevent the diverter from fully rotating or sliding into either the tub or shower position. For instance, take apart and clean the valve.
In Closing!
A stuck shower diverter valve that fails to redirect water flow can put a damper on your bathing experience. But with a bit of targeted troubleshooting and DIY solutions, you can easily get your valve moving freely once again.
But fret not! Regular maintenance and lubrication will then help prevent repeat sticking incidents in the future.

About Atikul
Atikul Islam shares his expertise with various tips & tricks to fix the problems with home appliances related to toilet, kitchen, bathroom, heating, & cooling systems. Read to know more about Atikul Islam.