
Touch faucets are designed to offer convenience and ease of use, allowing you to activate the water flow with a simple touch. It can be quite frustrating when the faucet’s touch functions don’t work.
So, today I’ll discuss why your delta touch faucet not responding to touch. If your Delta touch faucet not responding to touch troubleshooting by
- Checking the batteries
- Verifying grounding
- Insulating the spout
Also, ensure the valve is turned on and remember to use proper touch techniques while using. If nothing works, perform a reset on your Delta touch faucet.
Let’s dive into the detailed discussion on how to fix your delta touch faucet not responding to touch.
Table of Contents
How To Fix Delta Touch Faucet Not Responding To Touch
Here’s a step-by-step guide to troubleshooting your Delta Touch Faucet if it’s not responding to touch:
1. Check The Batteries
If your Delta touch faucet touch is not functioning properly, the first step is to check the batteries. When the batteries need to be replaced on Delta Touch2O faucets, the LED indicator light on the faucet’s base will blink red.
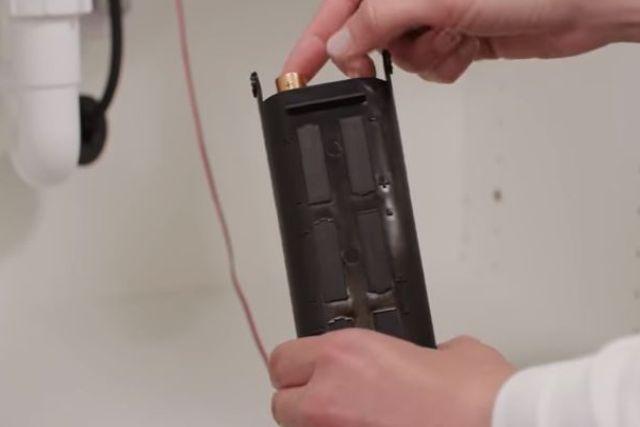
The number of batteries required depends on the model. Touch2O® Technology kitchen faucets require 6 AA batteries, while Touch2O® and Touch2O.xt models need 4 AA batteries. On average, ordinary batteries can last up to one year with 20 minutes of daily usage.
To replace the batteries,
- Locate the battery pack beneath the sink.
- Open the top cap of the battery box and remove the old batteries.
- Install new batteries, ensuring to follow the correct polarity indicated on the box.
- Afterward, replace the cap and battery box, ensuring the cable is unobstructed. Placing the battery box flat on the floor under the sink can help maintain accurate faucet sensitivity.
If the batteries are new and properly installed, and the LED light is not blinking red, you can try resetting the faucet. To do so:
- Remove the batteries from the pack.
- Wait for approximately 30 seconds before reinstalling them.
If the issue persists, inspect the wiring and solenoid in the affected area. Make sure they are not crossed or in contact with any metal, and adjust them if necessary.
If none of these solutions resolve the problem, it may be time to seek professional assistance, as specific components could be faulty.
Keep in mind that it is essential to keep the area under your sink clear to prevent any clogs or obstructions that could interfere with the intricate wiring.
2. Verify Grounding (For Models Before February 2009)
The faucet should be grounded to an electrical or plumbing line according to the instructions in the Delta Installation Guide. Note that Touch2O® faucets manufactured after February 2009 may not require grounding.
Also, if your faucet does not have a green ground wire, it may not require grounding. Proper grounding is important to prevent electrical shock and damage to the faucet and other electrical components.
The grounding wire should be connected to a suitable ground source, such as a grounded electrical outlet or a grounding rod.
To install a Delta touch faucet, ensure that the faucet is properly grounded and follow the manufacturer’s instructions carefully. It’s best to consult a professional plumber or electrician if you’re unsure how to ground your faucet.
3. Insulate The Spout
Confirm that the spout’s insulating elements are in place after you’ve verified proper grounding. These insulating elements help prevent electrical issues and ensure the faucet functions correctly. Check that they are securely installed and not damaged or missing.
4. Ensure The Valve Is Turned On
Check that the handle is in the ON position and that power is available.
Make sure the handle is in the ON position, as a closed or partially closed valve can restrict water flow and result in faucet malfunction.
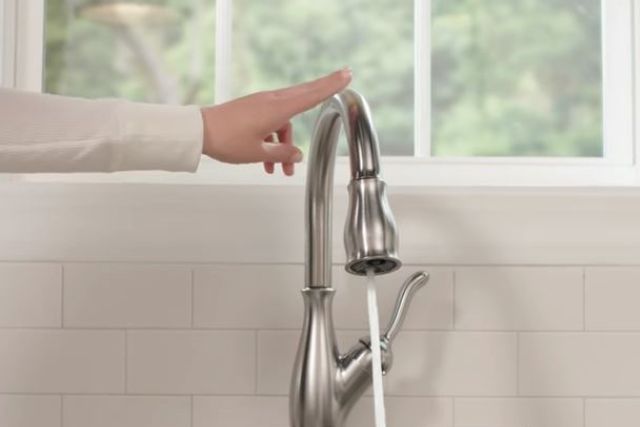
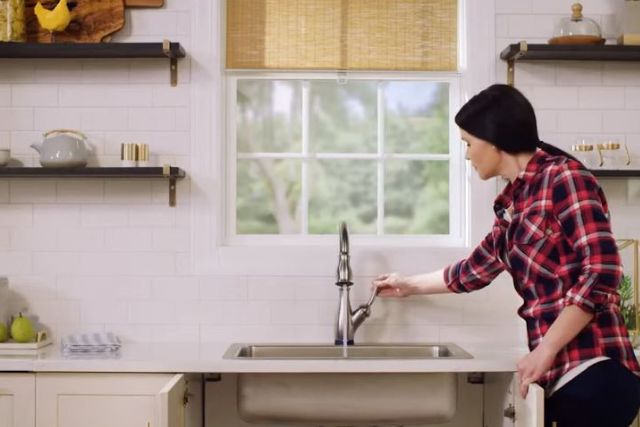
5. Proper Touch Technique
When using a touch-sensitive faucet, it is important to follow the proper touch technique to ensure optimal functionality. Here are some guidelines to keep in mind:

- Ensure deliberate touch: When activating the faucet, make sure your touch is deliberate and intentional. A light, quick tap on the designated touch area is usually sufficient. Avoid brushing or grazing the surface of the faucet, as this may not register as a proper touch.
- Avoid excessive touch duration: Try to avoid keeping your finger on the touch-sensitive area for too long. A brief touch is typically all that is needed to activate or deactivate the faucet. Prolonged contact may cause unintended behavior or confusion for the faucet’s sensor.
- Use fingertips, not fingernails: When touching the faucet, use the pad of your fingertip rather than your fingernail. Fingernails can interfere with touch recognition and may not provide accurate results.
- Avoid dry cloth or non-conductive materials: Do not use dry cloth or non-conductive materials, such as rubber gloves, to touch the faucet. These materials can inhibit the electrical conductivity required for the touch sensor to function properly. It is best to use your bare fingertips.
6. Reset Your Faucet
If nothing solves the problem a simple reset can resolve most of the issues. To reset your Delta touch faucet disconnect the battery, wait for 30 seconds, and then reconnect the battery.

For a complete guide, consider checking out this write-up dedicatedly to how to reset the Delta touch faucet.
How To Change Delta Faucet From Touch To Manual Mode
To make Lavatory Touch2O® and Touch2O.xt® faucets manual, the battery box needs to be removed while the water is running. This will disable the touch function and allow for manual operation of the faucet.

For Kitchen Touch2O® faucets, there are a couple of methods to make them manual: One is the Universal method, and the other one is the Alternative method for the older generation of Delta faucets.
Check our guide to see how you can manually operate the Delta faucets when touch functions don’t work and how to change the battery on the Delta touch faucet.
Delta Touch Faucet Blue Light Not Working
The blue LED light indicates that the “Touch” sensor is active on Delta faucets. It flashes indicating that the hands-free mode is activated.

If your touch features not responding check whether the blue light is still flashing or not. If your delta touch faucet blue light not working that means:
- The battery is old, damaged, or worn out.
- The spray head inlet is clogged with debris.
- The sensor is malfunctioning.
- Issues with the LED light wirings.
Contact Delta professionals if you have a warranty left. They’ll diagnose and fix the issue for you and the best part is you won’t be charged.
FAQs:
Do Touch Faucets Turn Off Automatically?
Yes, this alternative option automatically turns off once you finish using the sink and activates only when necessary. It conserves water and saves time by eliminating the need to shut off faucets manually.
What Does Red Light On Delta Touch Faucet Mean?
The LED indicator light on the faucet’s base blinks red when it’s time to replace the batteries. Failure to replace the batteries won’t disable the faucet completely, as it can still be operated manually.
How Long Do Touchless Faucets Last?
Typically lasting 2-5 years, if the battery voltage drops below 5.9V and no water flows, it suggests a clogged pilot valve due to dirt or debris. You can increase the lifespan of your faucet with good care and proper maintenance.
The Bottom Line
Bringing it all together, hopefully, you’ve got the solutions for the Delta touch faucet not responding to touch. Now you know the reasons behind this issue and how to fix it without any hassle.
Some Delta faucet users also mentioned about the Delta touch faucet had no water issue. Make sure you check that out too.
About James
James founded HomeUpgradeLab & was sharing his experiences to fix issues related to bathroom and toilet fixtures & fittings. Read to know more about James Hill & how he started this blog.