A few reasons can explain why Kohler toilet float sticking, including:
- Debris buildup in Kohler toilet float
- Mechanical damage
- The flapper chain is too short
- The float collar is too short for the water tank.
Firstly Clean the toilet tank to remove debris buildup. Replace worn-out parts in cases of mechanical damage. In the case of short flapper chains, adjust them. Plus, when the float collet is too close to the water tank, adjust the float’s collar. Getting professional help may be necessary if the problem still persists.
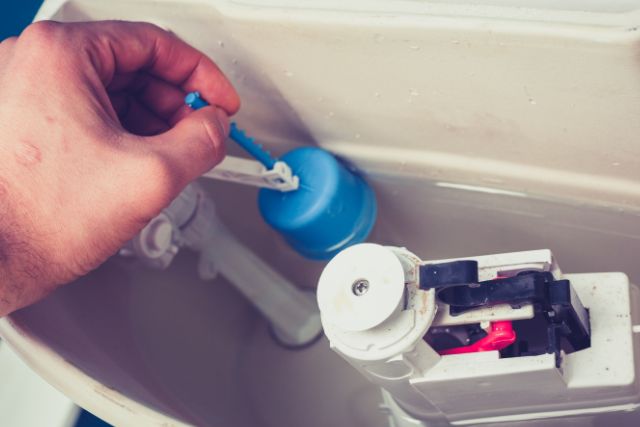
We’ll explore some of the common reasons why the float might be sticking, such as debris buildup or damaged float parts. We’ll also provide step-by-step instructions for troubleshooting and resolving the issue. So you can get your toilet back to functioning properly as quickly as possible.
Table of Contents
Quick Fix Chart About Kohler Toilet Float Sticking
There is an easy solution to the problem of a stuck float on a Kohler Toilet:
| Problem | Reasons | Solution |
| 1. Debris buildup in Kohler toilet float | > Mineral deposits > Sediment > Other particles | > Cleaning the float > Check the fill valve > Flush the toilet supply line > Regular maintenance |
| 2. Mechanical damage | > Misalignment > Obstructions > Worn or damaged components | > Adjust and realign > Clean and remove obstructions > Lubrication > Replace damaged components |
| 3. The float collar is too close to the water tank | > Float collar rubs against the water tank | > Adjust the float |
| 4. Too short flapper chain | > Due to the short flapper chain water continuously flows into the tank | > Adjust the flapper chain > Replace the flapper chain |
| 5. Corrosion or rust | > Water quality > Deterioration | > Maintaining cleanliness > Water treatment > Replacement parts > Regular maintenance |
| 6. Water quality deterioration | > Deterioration of float components > Buildup of mineral deposits | > Consider an upgrade > Proper management |
Kohler Toilet Float Sticking [5+ Easy Solutions]
One of the most common toilet issues is the Kohler toilet float sticking problem. The Kohler toilet float is a crucial component that controls the water level in your toilet tank.
If the Kohler toilet float sticks or malfunctions, it can cause excessive water consumption, water damage, or clogging of the toilet.
Here’s why this issue exists and how it can be resolved:
1. Debris Buildup In Kohler Toilet Float
One of the common reasons for Kohler toilet float sticking is debris build-up. Over time, mineral deposits, sediment, and other particles can accumulate on the float mechanism. Also makes it difficult to move.
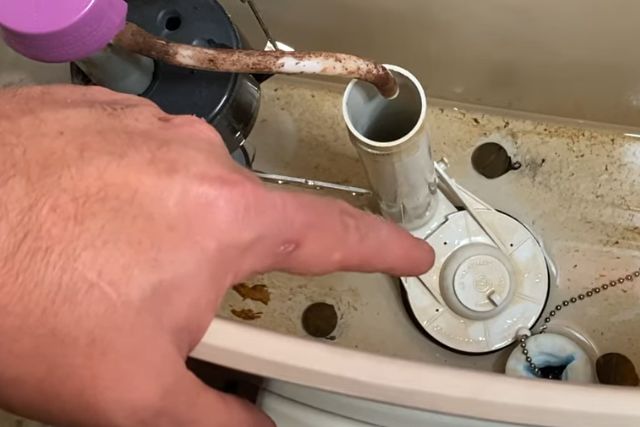
As a result, the float gets stuck in either the up or down position. It causes issues with the toilet’s flushing and refilling mechanism.
Simple Fixes:
Here are some easy fixes you can try to solve this issue:
i) Cleaning The Float:
Cleaning a float valve typically involves a few simple steps to ensure its proper functioning. Here’s a guide on how to clean a float valve :
Step- 1: Locate the main water supply valve and turn it off. It prevents water from flowing into the system during the cleaning process. This step is crucial to avoid any potential accidents or flooding.
Step- 2: Depending on your float valve type, you may need to unscrew or detach certain components to access the valve mechanism. Carefully follow the manufacturer’s instructions or consult a user manual for guidance.
Step- 3: The float assembly is typically connected to the valve with a screw or clip. Disconnect it carefully, ensuring you don’t damage any parts in the process. The float assembly consists of the float ball or cup, the float arm, and the valve mechanism itself.
Step- 4: Fill a bucket or basin with warm water and mild detergent. Submerge the float valve components in the soapy water. Use a soft brush or cloth to gently scrub away any dirt, debris, or mineral deposits. Pay close attention to the valve seat and any small openings or crevices.
Step- 5: After thoroughly cleaning the float valve components, rinse them with clean water to remove any soap residue. Ensure that no debris or cleaning agents remain. Use a lint-free cloth or towel to dry the parts completely before reassembling.
Step- 6: Once the float valve components are dry, carefully reassemble them in the reverse order of disassembly. Ensure all connections are secure and tightened appropriately.
Step- 7: Turn on the water supply valve. Then monitor the float valve’s performance to ensure it’s working correctly. Check for any leaks or abnormalities in water flow.
Note: Consult the manufacturer’s instructions for your specific float valve model. These steps serve as a general guideline. But individual valves may have slight variations in their disassembly and cleaning processes.
ii) Check The Fill Valve:
While you have the float assembly removed, it’s a good idea to inspect the fill valve as well. Look for any signs of damage, wear, or debris accumulation.
If the fill valve is damaged or worn, it may need to be replaced. If debris is present, flush the fill valve to remove it. For your convenience to read this content on how to replace the toilet fill valve.
However, despite the quality of modern toilet design, it is not uncommon for users to experience issues with the float mechanism in their toilets. One such issue is the tendency for the float to stick after flushing, which can cause the toilet to continue running and waste water.
This problem often requires the user to manually remove the toilet lid and bump the float to release it, which can be both inconvenient and time-consuming. To resolve this issue, it is recommended that users consult with a professional plumber to accurately diagnose and fix the underlying cause of the float sticking.
iii) Regular Maintenance:
To prevent debris build-up and sticking in the future, it’s important to perform regular maintenance on your toilet. This includes cleaning the toilet tank and components periodically, particularly focusing on the float assembly and fill valve.
Also, you can use vinegar or a commercial toilet cleaner to remove deposits and maintain optimal functioning.
2. Mechanical Damage
Physical damage to the float or float arm, such as cracks, bends, or breakage, can cause the float to stick. This damage may occur due to mishandling during maintenance, accidental impact, or deterioration over time.
Reasons:
Mechanical damage can also cause a toilet float to stick, leading to water filling and flushing problems. Here are some common reasons behind mechanical damage and potential solutions:
i) Misalignment:
If the float assembly is not aligned properly or the float arm is bent or damaged, it can cause the float to stick. Misalignment can occur due to rough handling, accidental impacts, or wear and tear over time.
ii) Obstructions:
Debris, such as sediment or toilet paper, can get lodged between the float and the tank wall. It prevents smooth movement and causes sticking.
iii) Worn Or Damaged Components:
The float assembly consists of various moving parts, such as the float arm, pivot rod, and linkage.
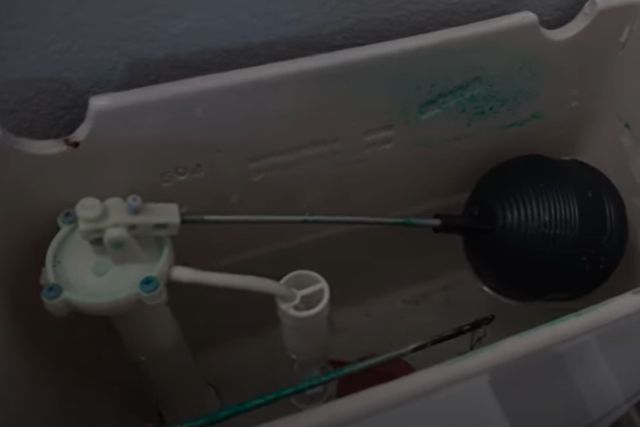
If any of these components are worn, bent, or broken, it can affect the proper functioning of the float and lead to sticking.
Simple fixes:
A number of solutions are available to address this problem:
i) Adjust And Realign:
A ball float is a remarkable buoyant object, often crafted from durable plastic or rubber. It is carefully attached to the lever or arm of a toilet tank. In response to the water level, it orchestrates the flow of water into the tank and indicates when it should stop.
On the other hand, a Fluidmaster fill valve emerges as a marvel of engineering, assuming its pivotal role within toilet tanks. The mechanism incorporates a meticulously crafted valve assembly. It concert with a float, orchestrates the cessation of water supply when the desired level is achieved.
In the event of misalignment, an elegant solution may be achieved by adjusting the float arm and repositioning the float assembly according to the manufacturer’s instructions. Ensuring that the float arm moves with effortless grace, devoid of any obstructions or hindrances, is paramount to its harmonious functioning.
iii) Lubrication:
Apply a small amount of silicone lubricant or plumber’s grease to the moving parts of the float assembly. Such as the pivot points and linkage, to ensure smooth movement and prevent sticking. Avoid using petroleum-based lubricants, as they can damage certain materials.
iv) Replace Damaged Components:
If you notice any visibly damaged or worn parts, such as a bent float arm or broken linkage, it’s best to replace them. Contact the manufacturer or a plumbing supply store to obtain the correct replacement parts. Follow the manufacturer’s instructions for installation.
Note: If the problem persists despite your efforts, it’s recommended that you consult a professional plumber. Based on your Kohler toilet’s specific circumstances, they can provide appropriate solutions.
3. The Float Collar Is Too Close To The Water Tank
If the float collar is too close to the water tank, it may be rubbing against it and causing the sticking problem. To resolve this, you can adjust the position of the float.
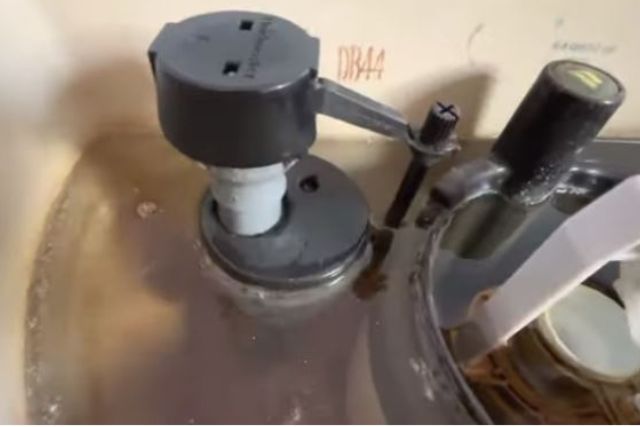
Also, if the float is old and breaking down, it may lose its buoyancy or become misshapen, causing it to stick. In this case, it’s advisable to replace the float altogether
Solutions:
i) Adjust The Collar Of The Float:
Step- 1: Turn off the water supply to the toilet by turning the shut-off valve located behind the toilet clockwise.
Step- 2: Remove the toilet tank lid by lifting it straight up or unscrewing any bolts that secure it in place. Set the lid aside in a safe location.
Step- 3: Look for the float assembly, which includes the collar, float arm, and float ball or float cup. It is typically attached to the fill valve or connected to the flush valve inside the toilet tank.
Step- 4: Depending on the specific design of your Kohler toilet, there may be different methods to adjust the float assembly. Here are two common adjustment methods:
- Float Arm Adjustment:
Look for an adjustment screw or clip on the float arm. Loosen the screw or release the clip, and then slide the float arm up or down to change the position of the float assembly. You can lower the float assembly to increase the water level in the tank or raise it to decrease the water level. Make small adjustments until you achieve the desired water level.
- Float Collar Adjustment:
Some float assemblies may have a sliding or rotating collar that allows for vertical adjustment. Check if the collar can be moved up or down along the float arm. Adjust the collar’s position to change the height of the float assembly and thereby adjust the water level.
Step- 5: Once you’ve made the necessary adjustments to the float assembly, turn the water supply back on by rotating the shut-off valve counterclockwise. Allow the tank to fill, and then flush the toilet to check if the float no longer sticks and the water level is at the desired level. If needed, repeat the adjustment process until you achieve the desired results.
Note: Remember to observe the manufacturer’s guidelines and instructions specific to your Kohler toilet model. If you are unsure about the adjustment procedure or encounter any difficulties, it is recommended to consult the manufacturer’s documentation or seek professional assistance.
ii) Replace The Float:
You can purchase a compatible replacement float from a Kohler dealer or a home improvement store. Follow the manufacturer’s instructions to remove the old float and install the new one correctly.
By replacing the float, you ensure that it functions properly and does not rub against the water tank, resolving the sticking issue.
4. Too Short Flapper Chain
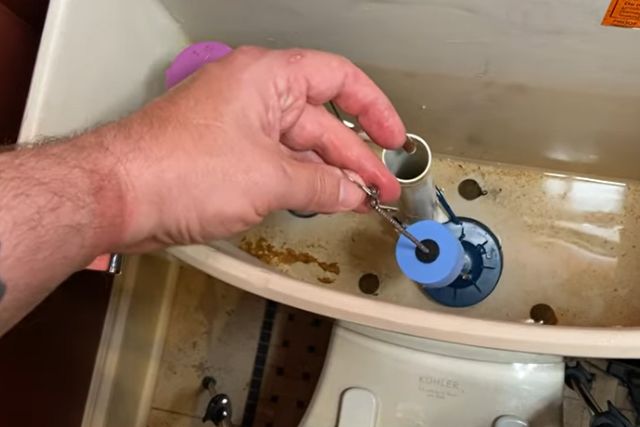
A short flapper chain can cause the float to stick in an elevated position. Consequently, water continuously flows into the tank because it cannot properly close the fill valve.
Solution:
To address the issue of a sticking float caused by a short flapper chain, adjust the flapper chain. Please follow the steps below in order to complete the process:
Step- 1: To shut off the water supply to the toilet, locate the shut-off valve behind the toilet and turn it clockwise. This prevents any water from flowing into the tank during the repair process.
Step- 2: By lifting the toilet tank lid straight up or unscrewing any bolts that secure it, you can remove it. Set the lid aside in a safe location.
Step- 3: Look for the chain that connects the flapper to the toilet handle lever. Check if the chain is too short and causing tension when the flapper is in the closed position. Ideally, the chain should have some slack, allowing the flapper to fully close and seal the tank.
Step- 4: If the chain is too short, it needs to be lengthened. Locate the chain’s attachment point on the toilet handle lever. Depending on the type of attachment, you may need to use pliers or your fingers to detach the chain temporarily.
Step- 5: Once detached, you can adjust the chain length by adding or removing chain links. If there are extra links available, you can simply attach the chain to a different link to create more Slack. If needed, you can purchase additional chain links from a hardware store to extend the chain.
Step- 6: Once you have adjusted the chain to the desired length, reattach it to the toilet handle lever. Ensure that the chain has enough slack so that the flapper can fully close when the float reaches the appropriate level.
Step- 7: Turn the water supply back on by rotating the shut-off valve counterclockwise. Allow the tank to fill, and then flush the toilet to check if the float is no longer sticking. If the issue persists, you may need to repeat the adjustment process and ensure there is enough slack in the chain.
Note: If adjusting the chain length does not resolve the sticking float issue, it’s possible that the flapper itself or the chain is damaged. In this case, consider replacing either the flapper or the chain entirely. Consult a Kohler dealer or a home improvement store to find a compatible replacement part.
5. Corrosion Or Rust
When floats or their components are exposed to water for extended periods of time, corrosion or rust can occur.
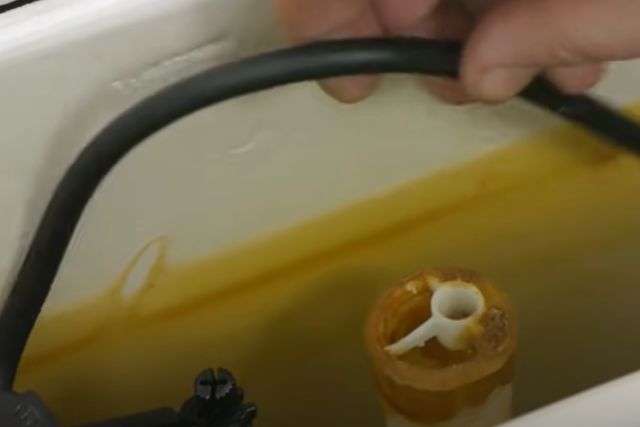
This can lead to rough surfaces or binding, hindering the proper movement of the float.
Reasons:
Corrosion or rust can indeed cause a toilet float to stick, resulting in issues with water filling and flushing. Let’s explore the reasons behind this problem:
i) Water Quality:
If your water supply has a high mineral content or contains corrosive elements, such as iron or sulfur. It accelerates corrosion and causes rust to form on the float.
ii) Deterioration:
Most of the time, the float and other metal parts of a toilet tank can naturally deteriorate due to regular use and moisture exposure. This wear can eventually result in rust or corrosion that causes sticking.
Simple fixes:
You can try the following solutions if you continue to have this problem:
i) Maintaining Cleanliness:
If the float is not severely damaged, you can try cleaning it to remove any rust or corrosion. Start by turning off the water supply to the toilet and flushing to empty the tank.
Then, carefully detach the float assembly, following the manufacturer’s instructions. Scrub the float gently with a mixture of vinegar and water or a mild cleaning solution. Rinse thoroughly and reinstall the float.
ii) Water Treatment:
Install a water treatment system if your water supply is high in minerals or causes corrosion. Water softeners or filtration systems can help reduce mineral buildup and corrosive elements. Plus, it helps extend the lifespan of toilet components.
iii) Replacement Parts:
If cleaning doesn’t resolve the issue, it may be necessary to replace the float or other corroded components. Check with the manufacturer or a plumbing supply store for compatible replacement parts.
Ensure that the new parts are made of corrosion-resistant materials like plastic or brass.
iv) Regular Maintenance:
Implement a routine maintenance schedule for your toilet to prevent future corrosion and sticking issues. This can include periodic cleaning, inspections, and addressing any water quality concerns promptly.
6. Age And Wear Out Parts
Floats, like any mechanical component, wear out over time. The materials may degrade, become less flexible, or develop rough surfaces, leading to sticking issues.
Reasons:
Age and wear can be significant factors leading to a sticking float in a Kohler toilet. The reasons behind this problem are as follows:
i) Buildup Of Mineral Deposits:
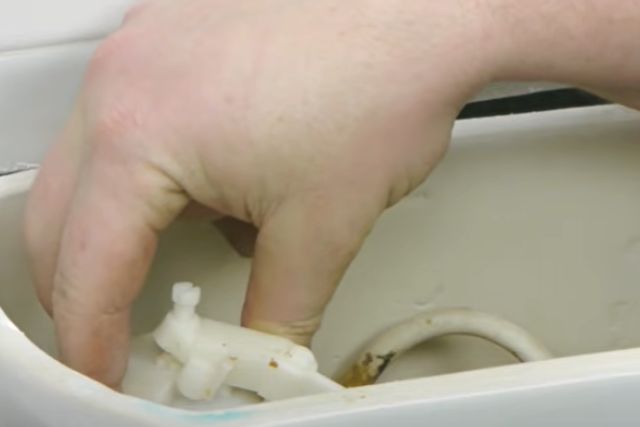
With prolonged use, minerals and sediment from the water supply can accumulate on the float and other parts of the toilet tank. This buildup can cause the float to stick, impeding its movement.
Simple Fixes:
In order to address this problem, there are a number of solutions available
i) Consider An Upgrade:
If your toilet is significantly old or shows signs of extensive wear, consider replacing it. Newer models often come with improved float mechanisms and other features. It can enhance performance and reduce the likelihood of sticking.
ii) Proper management:
Implement a routine maintenance schedule to prolong the life of your toilet and minimize sticking issues. This can include periodic cleaning and inspection of components. Also, it addresses any signs of wear or damage promptly
How To Adjust Kohler Toilet Float
To adjust the float on a Kohler toilet, follow these detailed steps:
i) Remove the toilet tank lid:
Lift off the lid from the back of the toilet tank. Put it on a stable surface and then set it aside.
ii) Locate The Float Assembly:
Inside the toilet tank, you will find the float assembly. The float is typically a ball-shaped device attached to a metal or plastic arm. The float assembly is responsible for controlling the water level in the tank.
iii) Adjustment Mechanism Identification:
Kohler toilets can have different types of adjustment mechanisms for the float. Commonly, you will find either a screw or a clip that holds the float in place. It allows you to adjust its position.
- Screw Adjustment:
If your toilet has a screw mechanism, look for a long threaded screw near the top of the float assembly. This screw raises or lowers the float by turning it clockwise or counterclockwise.
- Clip Adjustment:
If your toilet has a clip mechanism, you will find a small plastic or metal clip attached to the float arm. This clip can be moved up or down along the arm to adjust the float position.
iv) Adjust The Float Level:
Depending on whether you need to raise or lower the water level in the toilet tank, follow the appropriate steps:
- Screw Adjustment:
If your toilet has a screw mechanism, turn the adjustment screw clockwise to raise the float and increase the water level. Turn it counterclockwise to lower the float and decrease the water level. Make small adjustments, about a quarter turn at a time, and test the water level after each adjustment.
- Clip Adjustment:
If your toilet has a clip mechanism, slide the clip upward along the float arm to raise the float and increase the water level. Slide it downward to lower the float and decrease the water level. Again, make small adjustments and test the water level after each adjustment.
v) Test The Flush And Refill:
After making an adjustment, flush the toilet and observe the refill process. The water level in the tank should reach the adjusted level, and the float should stop the water flow when it reaches the desired height. If necessary, make further adjustments to achieve the desired flush and refill performance.
vi) Replace The Tank Lid:
Once you are satisfied with the float adjustment and water level. Then, carefully place the toilet tank lid back onto the tank and ensure it sits securely.
Essential Note: Remember, the purpose of adjusting the float is to ensure proper flushing and water conservation. It’s essential to strike a balance where the water level is sufficient for a good flush but not too high to cause water waste or potential overflow.
So, If you encounter any difficulties or the float adjustment doesn’t resolve the issue. If you still need assistance, consult Kohler’s user manual or contact customer service.
FAQs:
How Do You Loosen A Sticky Water Valve?
To loosen a sticky water valve, try applying a penetrating lubricant like WD-40 or vinegar to the valve and let it sit for a few minutes. Then, gently turn the valve back and forth to break up any residue.
How Long Do Toilet Floats Last?
The lifespan of toilet floats can vary, but on average they last around 5 to 7 years. Factors like usage frequency, water quality, and maintenance can affect their longevity.
What Is Toilet Float Mechanism?
The toilet float mechanism consists of a float ball or cup attached to an arm. When the water level rises, the float rises with it. Thus, the arm shuts off the water supply once the desired level is reached.
How Do You Unclog A Toilet With A Stick?
Unclogging a toilet with a stick can be done by inserting a sturdy, long-handled object. It is like a toilet auger, into the drain and twisting it clockwise to break up the clog. Be cautious to avoid damaging the toilet bowl.
What Are Some Common Problems With Float Valves?
There are common problems with float valves, such as not closing off drop-tight. High noise levels during discharge, valve chatter, and valve surging are also problems.
Conclusion
Kohler toilet float sticking can be stressful and time-consuming to deal with. However, with the right tools and knowledge, fixing the issue is possible. It’s important to always turn off the water supply and follow proper safety precautions before attempting any repairs.
However, It’s best to seek the help of a professional plumber if the issue persists or if you feel uncomfortable performing the repair yourself. Follow our tips and tricks if you need any advice about Kohler toilet leaks.

About James
James founded HomeUpgradeLab & was sharing his experiences to fix issues related to bathroom and toilet fixtures & fittings. Read to know more about James Hill & how he started this blog.