Several factors may contribute to Kohler toilet leaking between tank and bowl, including-
- Faulty tank bolts in Kohler toilet
- Damaged tank to bowl gasket
- Cracked Tank or bowl
- Loose flush valve in Kohler toilet
You can try tightening the bolts or replacing the damaged gasket between the tank and bowl to resolve this issue. Even if the problem persists, it may be necessary to replace the fill valve or flush valve. For proper resolution of the issue, a plumber is recommended.

We will guide you step-by-step on how to find the leak’s source and fix it in this article. Also, you’ll learn how to troubleshoot, replace faulty components, and maintain your toilet with our detailed instructions.
Table of Contents
Kohler Toilet Leaking Between Tank And Bowl [6 Easy Fixes]
If you have a Kohler toilet and notice water leaking between the tank and bowl. It’s important to address the issue as soon as possible. Many factors can contribute to this problem.

But with a little troubleshooting and some basic tools, you may be able to fix the issue yourself and avoid costly repairs. Let’s have a look at some reasons with the best guide.
Note: You can read our ultimate guide on Kohler toilet flush problems and how to fix them.
1. Faulty Tank Bolts In Kohler Toilet
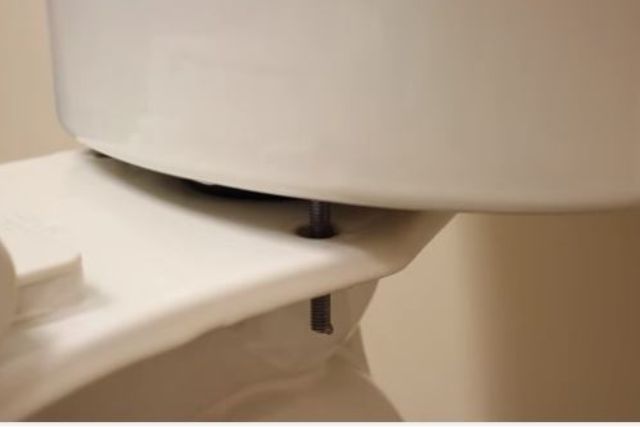
The most common reason for Kohler toilet leaks between the tank and bowl is faulty tank bolts. Tank bolts are responsible for securing the tank to the bowl. If they become loose or damaged, water can seep out.
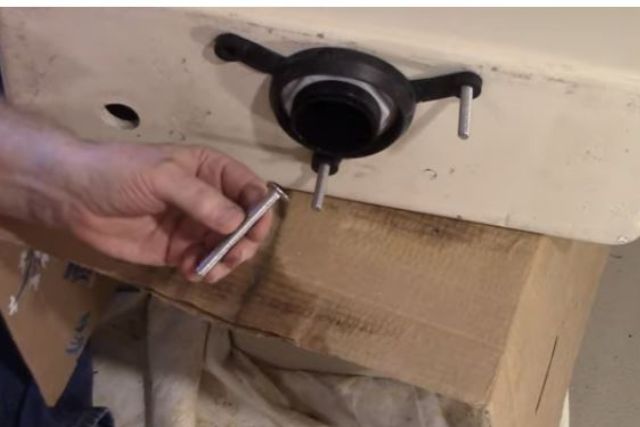
Causes:
Several factors can lead to this problem, some of which are as follows:
i) Wear And Tear:
Due to regular use, exposure to water, and cleaning chemicals, the tank bolts can wear out over time. This can cause them to become loose or corroded, leading to leaks.
ii) Improper Installation:
If the tank bolts were not installed properly. They may not provide a secure connection between the tank and the bowl. In this case, leaks are likely to occur.
iii) Over-tightening:
Excessive tightening of the tank bolts during installation can lead to cracks or damage. Also, It creates gaps where water can escape.
How To Fix:
In case malfunctions from the bolt assembly, here are some solutions:
i) Tighten The Bolts:
Start by checking if the bolts are loose. Using a wrench, gently tighten the bolts evenly on both sides. Be careful not to overtighten as it can cause damage. Check if the leak persists.
ii) Replace Washers:
If the bolts are tight but the leak persists, the rubber washers may be worn out. Turn off the water supply. Then drain the tank and remove the bolts. Replace the washers with new ones and reinstall the bolts. Turn on the water supply and check for leaks.
iii) Replace The Tank Bolts:
If the bolts are damaged or corroded, it’s best to replace them. If you require assistance with replacing the Kohler toilet tank bolts, here are some steps you need to follow:
Step- 1: Turn the water shut-off valve clockwise near the base of the toilet to stop the flow. Flush the toilet to drain out the remaining water from the tank.
Step- 2: Using a stable surface, remove the lid carefully from the back of the toilet tank.
Step- 3: Disconnect the water supply line at the bottom of the toilet tank with an adjustable wrench. Place a towel or bucket underneath to catch any water that may drip out.
Step- 4: Make sure the toilet tank is secured to the bowl with bolts. These bolts are usually located at the bottom corners of the tank. Using a wrench or pliers, loosen and remove the nuts from the underside of the tank. Carefully lift the tank and set it aside.
Step- 5: Clean the area around the bolt holes on the toilet bowl and remove any debris or old gaskets. Insert the new tank bolts into the holes. Make sure they are aligned properly.
Step- 6: From underneath the toilet bowl, place a washer and then a nut on each bolt and hand-tighten them. Use a wrench to tighten the nuts further, but do not overtighten them.
Step- 7: Place the toilet tank back onto the bowl, aligning the tank bolts with the holes. Once in position, hand-tighten the nuts from underneath until the tank is secure. Reconnect the water supply line to the bottom of the tank and tighten it with an adjustable wrench.
Step- 8: Turn on the water supply by turning the shut-off valve counterclockwise. Check for any leaks and ensure the tank is securely fastened to the bowl.
Essential Note: In case you’re unsure about the steps or if the issue persists after attempting the solutions. Then, contact a professional plumber. They will have the necessary expertise to diagnose and fix the problem effectively.
2. Damaged Gasket
The tank-to-bowl gasket is usually made of rubber or foam and is positioned between the tank and the bowl. Over time, due to regular usage, exposure to cleaning chemicals, or the natural degradation of the material, the gasket can become damaged.
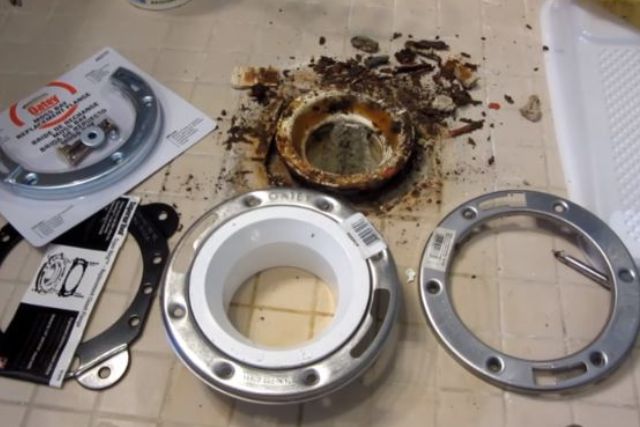
However, The gasket plays a crucial role in forming a watertight seal between the tank and the bowl of the toilet. If this gasket is worn, cracked, or misaligned, it can lead to water leakage.
Causes:
There are several reasons why the gasket between the tank and bowl can be damaged:
i) Age And Deterioration:
The gasket can deteriorate due to constant exposure to water, cleaning agents, and the general wear and tear of usage. This can cause the gasket to become brittle, cracked, or degraded, leading to leaks.
ii) Improper Installation:
If the gasket was not properly installed during the initial setup or during maintenance, it may not form a tight seal. This can result in water leakage between the tank and the bowl.
How To Replace Damaged Gasket On Kohler Toilet
You can fix a damaged tank-to-bowl gasket by following the steps below:
Step 1: Before beginning any repairs, shut off the water supply to the toilet. Locate the shut-off valve near the base of the toilet and turn it clockwise to stop the water flow.
Step 2: Flush the toilet to drain as much water as possible from the tank. You can also use a sponge or towel to soak up any remaining water.
Step 3: Unscrew the tank bolts using a wrench. Carefully lift the tank and place it on a soft towel or cloth to protect the surface. Be cautious as the tank can be heavy.
Step 4: Examine the tank-to-bowl gasket for any signs of damage, such as cracks, tears, or wear. If it appears to be worn or damaged, it will need to be replaced.
Step 5: Purchase a new tank-to-bowl gasket that is compatible with your Kohler toilet model. Follow the manufacturer’s instructions to install the new gasket. Ensure that it is aligned properly and provides a secure seal between the tank and bowl.
Step 6: Carefully place the tank back onto the bowl, aligning the bolt holes. Install the tank bolts and tighten them evenly on both sides. Avoid over-tightening, as it can damage the gasket or the toilet components.
Step 7: Once everything is securely reassembled, turn on the water supply to refill the tank. Check for any leaks between the tank and bowl. If there are no leaks, flush the toilet to ensure proper functioning.
3. Worn-Out Washers
The rubber washers located between the tank and bowl can deteriorate over time. As a result, it causes a faulty seal and results in water leakage.
How To Replace Washers
To replace the worn-out washers, follow these steps:
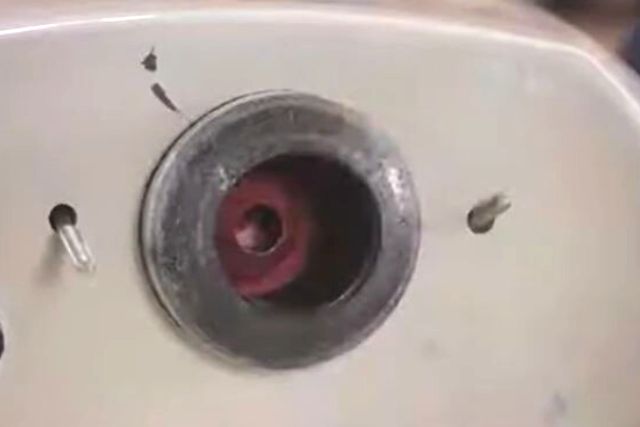
Step- 1: Turn off the water supply and flush the toilet to empty the tank.
Step- 2: Disconnect the water supply line from the fill valve at the bottom of the tank.
Step- 3: Unscrew and remove the nuts securing the bolts underneath the tank. These are the same bolts you tightened earlier.
Step- 4: Lift the tank carefully, ensuring not to damage any connected parts, and set it aside on a soft surface. Locate the rubber washers on the bottom side of the tank, where it meets the bowl. There may be one or two washers per bolt.
Step- 5: Remove the old washers and replace them with new ones of the same size and shape. Ensure they fit securely around the bolt holes.
Step- 6: Reassemble the tank by reversing the steps above: position the tank back onto the bowl, align the bolts with the corresponding holes, and tighten the nuts evenly.
Step- 7:Reconnect the water supply line to the fill valve. i. Turn on the water supply, check for any leaks, and adjust the tightness of the bolts if necessary.
Note: Remember to exercise caution and follow the manufacturer’s instructions when performing any repairs or maintenance on your toilet. If the leak persists despite attempting the solutions mentioned, it may be advisable to consult a professional plumber for further assistance.
4. Loose Flush Valve
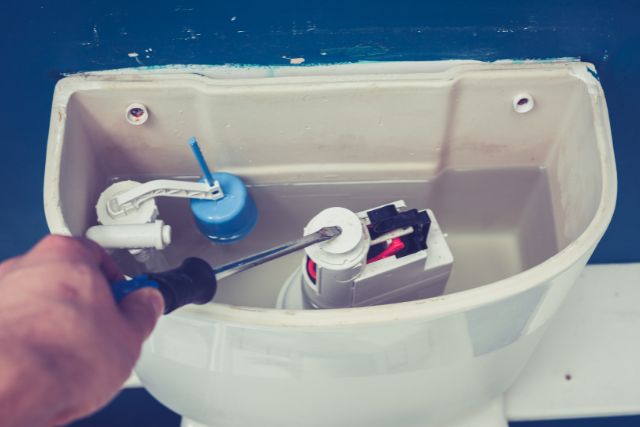
The flush valve is responsible for controlling the release of water from the tank into the bowl during flushing. If it becomes loose or misaligned, it can result in water leakage.
Causes:
In the case of this issue, there are a number of contributing factors:
i) Wear And Tear:
The components of the flush valve can experience wear and tear, causing it to become loose or misaligned. This can happen due to regular usage and exposure to water and cleaning agents.
ii) Improper Maintenance:
Maybe the flush valve was not installed correctly. In fact, if it was not properly maintained during previous repairs, it could lead to leaks.
How To Fix:
Here are six steps you can follow to fix a loose flush valve on a Kohler toilet.
Step- 1: Locate the water shut-off valve near the base of the toilet. Then turn it clockwise to shut off the water flow. Flush the toilet to drain out the remaining water from the tank.
Step- 2: Carefully lift off the lid from the back of the toilet tank. Set it aside on a stable surface.
Step- 3: Look for the flush valve assembly, which is usually located in the center of the tank. It consists of a flapper or canister-type valve that controls the water release during flushing.
Step- 4: Inspect the flush valve to identify any loose connections. There may be a retaining nut or fasteners holding the flush valve assembly in place. Use an adjustable wrench or pliers to tighten any loose nuts or fasteners, making sure not to over-tighten them.
Step- 5: Turn on the water supply to fill the toilet tank. Once the tank is full, flush the toilet and observe if the flush valve operates smoothly without any leaks or wobbling. If it still feels loose or leaks, proceed to the next step.
Step- 6: If tightening the flush valve didn’t solve the problem, you may need to replace the flapper or canister-type valve. For replacement parts and installation instructions, consult Kohler Toilet’s user manual.
However, Follow the instructions carefully to install the new flush valve components, ensuring a secure and watertight connection.
5. Faulty Fill Valve
A faulty fill valve could also be to blame if your Kohler toilet is leaking between the tank and bowl.
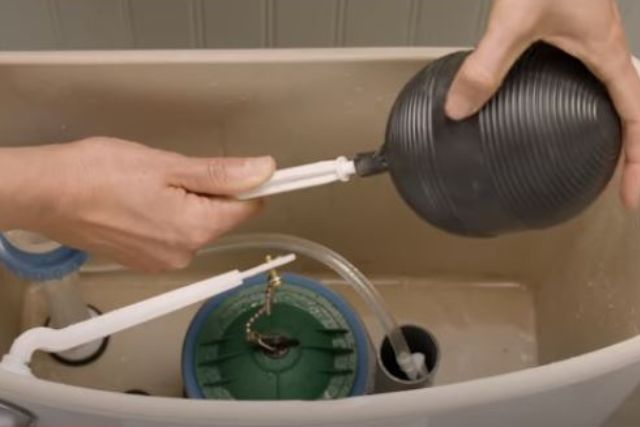
The fill valve is responsible for refilling the tank with water after each flush. If it malfunctions or becomes damaged, it can result in water leakage.
Causes:
As far as the cause of this issue is concerned, there can be a number of factors to consider
i) Degradation:
During normal use, the fill valve’s components can wear out. Thus, it causes a faulty seal or malfunctioning valve mechanism. This can result in water leakage between the tank and the bowl.
ii) Sediment Buildup:
Sediment or debris from the water supply can accumulate in the fill valve, obstructing its proper functioning. This can cause the valve to fail, resulting in leaks.
iii) Incorrect Adjustment Or Installation:
A leak may occur if the fill valve was not adjusted or installed correctly during initial setup or maintenance.
How To Fix:
If the fill valve is faulty, there are some steps, you can try:
Step- 1: If you plan to make any repairs to the toilet, make sure you turn off the water supply. Locate the shut-off valve near the base of the toilet and turn it clockwise to stop the water flow.
Step- 2: Flush the toilet to drain as much water as possible from the tank. Use a sponge or towel to soak up any remaining water.
Step- 3: Examine the fill valve for any visible signs of damage or malfunction. Look for cracks, broken parts, or mineral buildup. If the valve appears damaged or is not functioning correctly, it will likely need to be replaced.
Step- 4: Purchase a replacement fill valve that is compatible with your Kohler toilet model. Follow the manufacturer’s instructions or seek professional assistance to ensure proper installation of the new fill valve.
Step- 5: Adjust the height of the fill valve according to the recommended settings for your toilet model.
Step- 6: Turn on the water supply and allow the tank to refill. Observe for any leaks between the tank and bowl. If the leak persists, additional adjustments or repairs may be required.
Essential Note: If the fill valve is not visibly damaged but water flow is still affected, there may be sediment or debris obstructing the valve.
In this case, you can try cleaning the fill valve by following the manufacturer’s instructions. This may involve disassembling the valve, clearing any debris, and reassembling it properly.
6. Cracked Bowl Or Tank
Another possible cause of a leak between a Kohler toilet’s tank and bowl is a cracked tank or bowl.
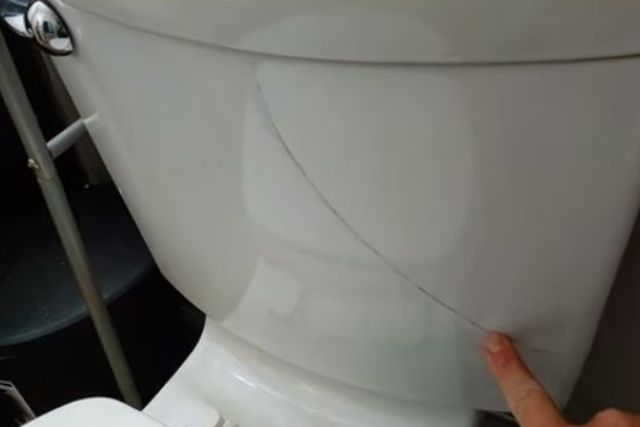
Cracks can develop due to various reasons, and they can result in water leakage.
Causes:
A number of factors can contribute to the occurrence of this problem, and some of them are as follows:
i) Physical Impact:
A heavy impact or accidental drop on the toilet can lead to cracks in the tank or bowl. This can occur during transportation, installation, or even due to objects falling onto the toilet.
ii) Temperature Changes:
As the temperature fluctuates or rapidly changes, the porcelain material of the tank or bowl can expand and contract. As a result, it causes cracks to form.
iii) Age And Deterioration:
It is possible for the materials used in the tank and bowl to deteriorate sometimes. This makes them more susceptible to cracking. This can occur due to natural aging or exposure to harsh chemicals.
How To Fix:
Step- 1: Assess The Damage:
Carefully inspect the tank and bowl for any visible cracks. If you notice cracks, it is likely that the tank or bowl will need to be replaced, as repairing a cracked porcelain component can be challenging and may not provide a reliable long-term solution.
Step- 2: Turn Off The Water Supply:
Before attempting any repairs or replacement, turn off the water supply to the toilet. Locate the shut-off valve near the base of the toilet and turn it clockwise to stop the water flow.
Step- 3: Drain The Tank:
Flush the toilet to drain as much water as possible from the tank. Use a sponge or towel to soak up any remaining water.
Step- 4: Replace The Tank Or Bowl:
Contact Kohler or a professional plumber to obtain a replacement tank or bowl that matches your specific toilet model. Follow the manufacturer’s instructions or seek professional assistance to ensure proper installation of the new tank or bowl.
Step- 5: Reassemble The Toilet:
Once the new tank or bowl is installed, reattach it to the bowl using the appropriate tank bolts and gaskets. Ensure that the connections are secure and properly sealed.
Step- 6: Turn On The Water Supply:
After reassembling the toilet, turn on the water supply to refill the tank. Check for any leaks between the tank and bowl. If there are no leaks, flush the toilet to ensure proper functioning.
Essential Note: Compared to other repairs, replacing a tank or bowl can be more complicated and involved. If you’re unsure of how to replace your toilet or encounter any difficulties, it’s best to call an experienced plumber.
FAQs:
Why Is My Toilet Leaking At The Base Of The Tank When I Flush?
When a toilet leaks at the base, it’s usually due to a failed wax gasket that seals the toilet to the floor. The wax seal needs replacement to restore the watertight connection between the toilet and the floor.
What Is The Part Between The Toilet Tank And Bowl?
There is an interconnection between the toilet tank and bowl called a flapper or flapper valve. It is responsible for triggering a flush of water. The device is located at the bottom of the tank and plays an important role in flushing.
How Do You Replace A Kohler Toilet Flush Valve Gasket?
Drain the tank and turn off the water supply before replacing a Kohler toilet flush valve gasket. Install a new gasket by unscrewing the bolts and removing the old one. Then reassemble the tank and turn on the water.
How Long Do Flush Valve Seals Last?
Flush valve seals in toilets have different lifespans. In general, wax seals last 20 years, flush valves 6-7 years, and fill valves 4-5 years. Regular maintenance and part replacement are important for optimal performance.
How Do I Know If My Kohler Toilet Valve Seal Is Leaking?
To determine if your Kohler toilet valve seal is leaking, look for water pooling around the base of the toilet. Listen for continuous water running or observe a trickle of water. These signs indicate a potential leak in the valve seal.
Conclusion:
A Kohler toilet leaking between the tank and bowl may seem like a small issue, but it can lead to bigger problems if left unaddressed. By following the steps outlined in this post, you can easily identify and fix the problem.
In case you don’t feel comfortable making repairs yourself, it’s always a good idea to hire a plumber. They can diagnose the problem and make the necessary repairs quickly and efficiently. Further, if you suffer from Kohler toilet loud flushes, please check our other article. Our guide will be tailored to your requirements.

About James
James founded HomeUpgradeLab & was sharing his experiences to fix issues related to bathroom and toilet fixtures & fittings. Read to know more about James Hill & how he started this blog.