
If your Kohler toilet not filling, there could be a number of reasons why this is happening. Such as:
- Kohler toilet fill valve issue
- Float not working
- Kohler toilet flapper problem
- Incorrect water supply
To fix the issue, check the fill valve, float, flapper, water supply, and chain. Adjust or replace components as needed. If you are unsure about how to perform these steps or if the problem persists after attempting these solutions, consult a professional plumber for assistance.
The purpose of this post is to explain why your Kohler toilet may not be filling and how you can fix it. In fact, using our guidance, you can resolve the issue quickly and effectively.
Table of Contents
Quick Fixes To Kohler Toilet That Not Filling:
Check out this quick chart about why your Kohler toilet is not filling, and what you can do about it!
| Problem | causes | solutions |
| 1. Kohler toilet fill valve issue | > Flapper becomes stuck > Flapper chain problem > Blocked flapper’s holes > Malfunctional flapper | > Check for obstruction > Examine for mechanical damage > Adjust the fill valve height > Adjust the fill valve water’s level > Replace the fill valve |
| 2. Kohler toilet float not working | > Too low float design | > Check the float adjustment > Ensure proper float operation > Check for leaks |
| 3. Kohler toilet flapper problem | > Flapper becomes stuck > Flapper chain problem > Blocked flappers holes > Malfunctional flapper | > Check for flapper damage > Clean the flapper and chain > Adjust the flapper chain |
| 4. Incorrect water supply | > The water supply valve is closed > Clogged water supply line > Blocked refill tube > Low water pressure | > Adjust the water level |
| 5. Broken or disconnected chain | > Damaged chain | > Adjust the chain |
| 6. Clogged vent | > Debris build-up | > Unclog the vent |
Kohler Toilet Not Filling [5+ Easy Solutions]
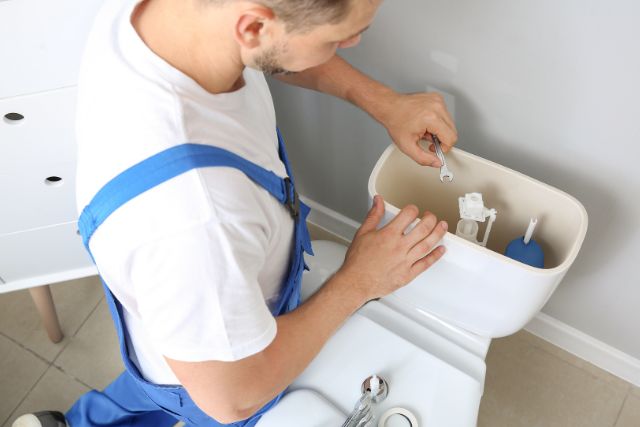
One of the most common problems that many homeowners encounter is a Kohler toilet that is not filling properly. This can lead to inefficient flushing and even a complete breakdown of your toilet.

Usually, fixing a Kohler toilet that isn’t filling up may seem like a daunting task, but with the right information and guidance, it can be a straightforward process.
That’s why we are here to help you identify the cause of your Kohler toilet not filling. Besides, we’ll provide you with practical solutions to get it functioning correctly again.
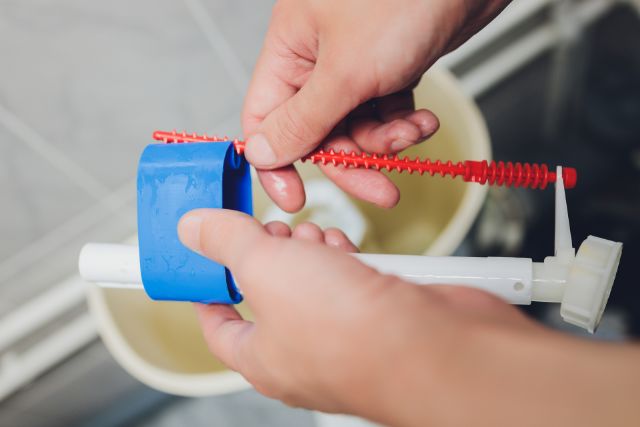
1. Kohler Toilet Fill Valve Issue
The fill valve in a Kohler toilet is responsible for controlling the water flow into the toilet tank. It is typically connected to the water supply line and is designed to refill the tank after each flush. The fill valve is connected to both the toilet float and the refill tube.
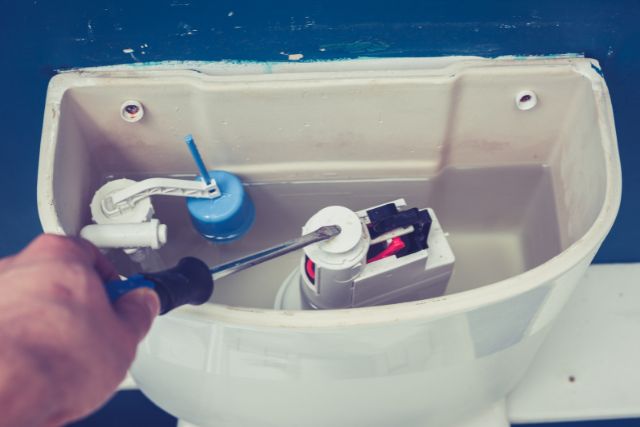
When someone flushes the toilet, the float, which is attached to the fill valve. Then, it moves downward as the water level in the tank drops. This movement opens the fill valve. It allows the water to flow from the water supply line into the tank.
As the tank fills, the float rises with the water level. Once the tank reaches the desired water level, the float closes the fill valve, stopping the water flow.
Reasons:
If the fill valve breaks or is faulty, it can result in the tank failing to fill with water. Here are some possible reasons for fill valve issues:
i) Mechanical Failure:
The internal components of the fill valve may wear out or become damaged, leading to mechanical failure. This can cause the valve to become stuck in either the open or closed position. It prevents proper water flow.
ii) Build-up Of Debris:
Sediments, gunk, or mineral deposits from hard water can accumulate inside the fill valve. It causes clogs which prevent the water flow. This can result in reduced or no water entering the toilet tank.
iii) Rust Or Corrosion:
In areas with corrosive water or if the fill valve is made of materials susceptible to rust, corrosion can occur sometimes. It affects the valve’s functionality and causes it to malfunction.
Fixes:
To troubleshoot fill valve issues, you can try the following steps:
i) Check For Obstructions:
Inspect the fill valve for any debris, sediment, or mineral build-up. If you notice any blockages, you can try cleaning the valve to restore proper water flow. Follow the manufacturer’s instructions or consider using a descaling solution specifically designed for toilet fill valves.
ii) Adjust The Fill Valve Height:
Sometimes, the fill valve may need to be adjusted to ensure it allows the tank to fill properly.
Step- 1: Close the water shut-off valve near the toilet and turn it clockwise. This will prevent any water from flowing into the tank while you make adjustments.
Step 2: Lift the lid of the toilet tank and set it aside in a safe place. Be careful as the lid may be heavy or fragile.
Step 3: Connect the water supply line to the fill valve located on the left side of the tank. It has a float attached to it, which controls the water level in the tank.
Step 4: Look for a screw or a clip on the side of the fill valve that holds the float in place. Depending on the type of fill valve, you may have to loosen the screw or squeeze and slide the clip.
Step 5: Check the water level in the tank, which is usually marked on the inside. Adjust the height of the float accordingly. Make sure, that it sits at the desired level when the tank is full.
Step 6: Slowly turn on the water supply valve to allow water to fill the tank. Observe the water level and check if it reaches the desired height. If it is too low, adjust the float to allow more water in.
If it is too high, adjust the float to decrease the water level. Repeat this process until the water level is at the desired height. Remember to turn off the water supply. Then, replace the tank lid once you have achieved the desired fill valve height.
[Note: Check the manufacturer’s instructions for your specific Kohler toilet model on how to adjust the fill valve height]
iii) Replace The Fill Valve:
Inspect the fill valve for any damage or malfunction. If it’s faulty, it may not allow water to enter the tank properly. If needed, replace the fill valve with a new one.
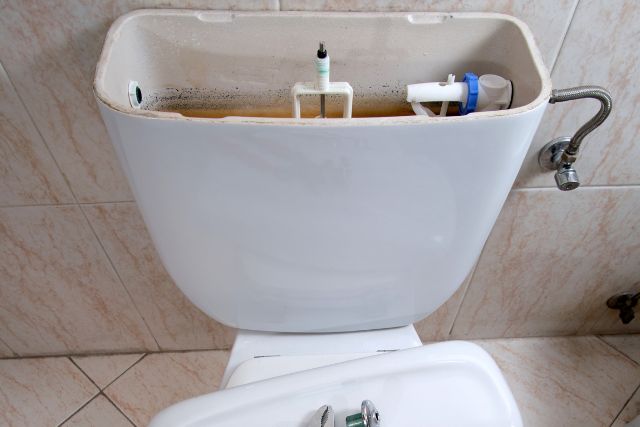
2. Misadjusted Or Worn-out Kohler Toilet Float
When the float design in a Kohler toilet tank is set too low, it can result in a low water level in the tank. This can lead to insufficient water flow during flushing.
Fixes:
To fix the issue of a Kohler toilet tank not filling with water, you can try the following steps:
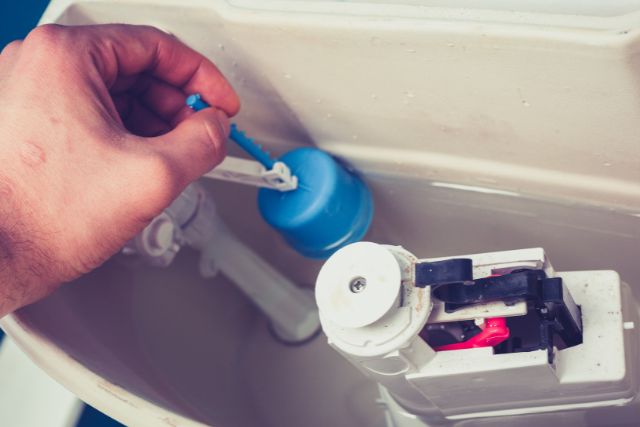
i) Check The Float Adjustment:
Locate the float in the toilet tank. It can be a cylinder, cup, or ball attached to the fill valve by a rod or arm. If the float is set too low, adjust it by gently bending the rod or arm downward to increase the water level. If it’s set too high, bend it upward to lower the water level.
ii) Ensure Proper Float Operation:
Make sure the float moves freely without any obstruction. Sometimes, debris or mineral buildup can hinder the float’s movement. It causes to get stuck in a certain position. Clean the float and its mechanism if necessary.
iii) Check For Leaks:
Inspect the toilet tank and connections for any leaks. A leak can cause the tank to lose water, leading to inadequate filling. If you find any leaks, tighten or replace them.
3. Kohler Toilet Flapper Not Sealing Correctly
Sometimes, when a Kohler toilet doesn’t fill water adequately, the issue may lie with the toilet flapper. Kohler toilet bowl flappers allow flushing water to enter and seal immediately.

Once the flush is complete, ensure that water remains within the tank for the next flush.
Reasons:
These flappers can become stuck, preventing water from entering the tank or leaking out. In order to explain why, here are a few reasons:
i) Too Loose Or Tight Flapper Chain:
One common issue that can cause a Kohler toilet to not fill water adequately is a problem with the flapper chain. The flapper is connected to a lifting chain, which should have about a 1/2-inch slack. If the flapper chain is too tight or too loose, it can prevent water from filling properly in the toilet.
When the flapper chain is too loose, the flapper may not open sufficiently when the flush handle is pressed. This can result in inadequate filling of water in the tank. On the other hand, if the flapper chain is too tight, it can prevent the flapper from sealing properly, leading to water leakage and inadequate filling.
ii) Broken Flapper Valve
Inside the toilet tank, there is a chain that connects the flush handle located outside the tank to the flapper valve located at the bottom of the tank. The flapper valve is responsible for controlling the release of water from the tank into the bowl during a flush.
When the flush handle is pressed, it lifts the chain, which lifts the flapper valve, allowing water to flow from the tank into the bowl. Once the flushing is complete, the flapper valve drops back into place, sealing the tank and stopping the water flow.
If the chain connecting the flush handle to the flapper valve is broken or disconnected, it can disrupt the flushing process. When the flush handle is pressed, there won’t be any tension on the chain, causing the flapper valve to remain closed. As a result, no water will enter the tank, leading to inadequate filling.
iii) Blocked Flapper Holes:
Another issue that can occur with the flapper is when the lifting chain hangs freely and ends up blocking the flapper holes. This can prevent water from entering the tank properly, resulting in insufficient filling.
iv) Malfunction Flapper
The chains attached to the flapper are also susceptible to accumulating dirt and debris. The accumulation can cause the flapper to malfunction and stop sealing or opening properly. As a result, the toilet may experience either a constantly running toilet or one that fails to fill water adequately.
Fixes:
It is a good idea to try the following steps if you are having issues with your flapper.
i) Adjust The Flapper Chain:
Ensure that the chain connecting the flapper to the flushing mechanism has about a 1/2-inch slack. If it’s too loose, tighten it slightly. If it’s too tight, loosen it to allow proper movement of the flapper.
If you need any assistance in resolving the broken chain problem, please follow the Step by Step instructions below:
Step- 1: Inspect The Chain
To troubleshoot this issue, remove the toilet tank lid and locate the chain inside. Verify that the chain is properly connected at both ends. One end is attached to the flush handle and the other end is connected to the flapper valve’s lift arm.
Step- 2: Clean The Flapper And Chain:
Remove any dirt or debris that may have accumulated on the flapper or the chain. Use a soft brush or cloth to clean them thoroughly.
Step- 3: Reconnecting The Chain:
If the chain is disconnected, you can simply reattach it. See if the flapper valve lift arm has a small hole or hook for connecting the chain. Carefully reattach the chain, ensuring it has the right amount of tension but is not overly tight.
Step- 4: Checking Chain Length:
It’s also important to ensure that the chain is the appropriate length. If it’s too long, it can get tangled or caught on other components in the tank. If it’s too short, it may prevent the flapper valve from fully closing, leading to continuous water flow. Adjust the chain length as needed to allow proper functioning.
Step- 5: Testing The Flushing Mechanism:
Observe the flapper valve movement after reattaching or adjusting the chain. It should lift and allow water to flow into the tank. Then close tightly once the tank is filled.
ii) Replace The Flapper:
Inspect the flapper for any signs of damage or wear. If it’s worn out or damaged, consider replacing it with a new flapper that is compatible with your Kohler toilet model.
4. Incorrect Water Supply
Ensure that the water supply valve, usually located behind or near the toilet, is fully open. If it’s partially closed or completely shut off, the toilet tank will not fill with water.
Reasons:
Listed below are some common reasons why a toilet tank may not be able to fill with water when it should:
i) Water Supply Valve Is Closed:
The water supply valve, located behind or near the toilet, may be partially or completely closed, preventing water from entering the tank. Often, this happens after someone accidentally turns the valve off or after maintenance or repairs.
ii) Clogged Water Supply Line:
The water supply line that connects the water supply valve to the toilet tank can become clogged with debris, sediment, or mineral deposits. It can prevent the tank from filling by restricting or blocking the flow of water.
iii) Blocked Refill Tube:
The refill tube, which directs water into the overflow pipe, can become blocked or disconnected. If the refill tube is clogged or not properly attached, it can prevent water from entering the tank.
iii) Low Water Pressure:
If the water pressure in the plumbing system is too low, it can impede the proper filling of the toilet tank. It may be caused by a partially closed main water valve or municipal water supply problems.
Fixes:
Here are a few more details on how to solve this issue:
Step- 1: Locate The Water Supply Valve:
The water supply valve is typically positioned behind or near the toilet, near the floor, or wall. It is usually a small lever or knob that controls the flow of water to the toilet.
Step- 2: Check The Position Of The Water Supply Valve:
Ensure that the water supply valve is fully open. This means the lever or knob should be turned or positioned in the direction parallel to the water supply pipe. If the valve is partially closed or completely shut off, it will restrict or stop the water flow to the toilet tank.
Step- 3: Open The Water Supply Valve:
If you find that the water supply valve is not fully open, turn the lever or knob in a clockwise direction to open it. Make sure it is fully open to allow the water to flow freely.
Step- 4: Test The Toilet Tank:
After opening the water supply valve, flush the toilet and observe if the tank starts filling with water. If the water supply issue was the cause of the problem, the tank should now begin to fill properly.
Step- 5: Inspect For Leaks:
Make sure the water supply valve, water supply line, and connections are free of leaks while the tank is filling. If you notice any leaks, tighten any loose connections or consider replacing faulty components. Such as the water supply line or valve.
Step- 4: Ensure Proper Water Flow:
After the tank fills, check if the water flow into the tank is steady and strong. Water flow issues may require further investigation or professional assistance if they are slow or weak.
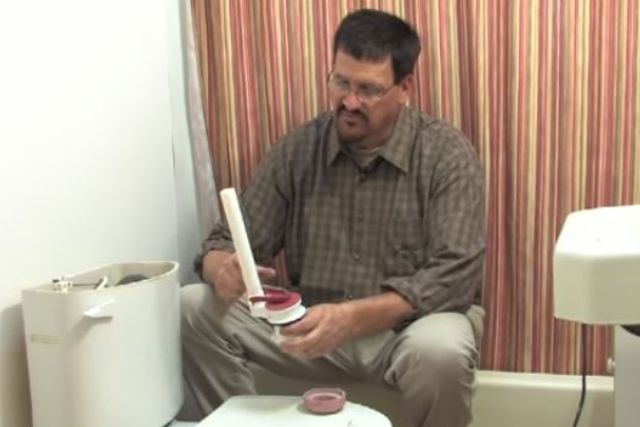
5. Damaged Overflow Tube
If your Kohler toilet is not filling, the last reason could be a faulty or damaged overflow tube. The overflow tube is a crucial component of the toilet tank that prevents it from overflowing by diverting excess water into the toilet bowl.
When the overflow tube has a crack or leak, it disrupts the filling process of the tank. Instead of the water rising to the desired level, it flows into the damaged portion of the tube and leaks into the toilet bowl. As a result, the tank does not fill up properly.
Reasons:
A crack or leak in the overflow tube can occur due to various factors, such as:
i) Age And Wear:
Most of the time, the overflow tube can deteriorate and develop cracks or leaks due to constant exposure to water and the natural aging process.
ii) Excessive Water Pressure:
If the water pressure in your plumbing system is too high, it can exert additional stress on the overflow tube, leading to cracks or leaks.
iii) Physical Damage:
Accidental impact or mishandling during repairs or maintenance work can cause damage to the overflow tube.
To resolve the issue of a faulty or damaged overflow tube, it is generally recommended to replace the entire flush valve assembly, which includes the overflow tube.
How To Replace Overflow Tube In Kohler Toilet
Here are the steps involved in replacing the overflow tube:
Step #1: Turn Off The Water supply:
Locate the shut-off valve near the toilet and turn it clockwise to stop the water flow. Flush the toilet to drain out as much water as possible from the tank.
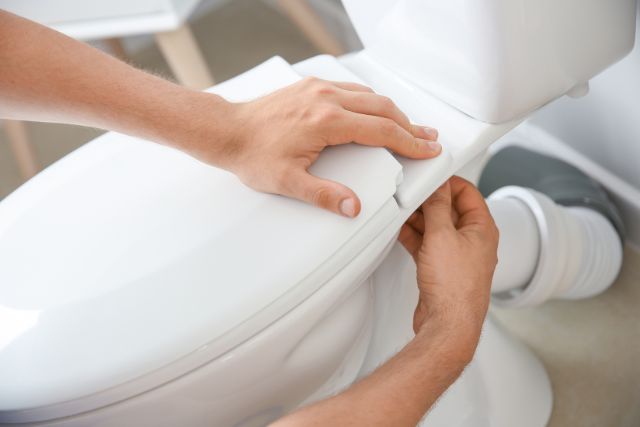
Step #2: Remove The Tank lid:
Carefully lift the tank lid off and set it aside in a safe place. Disconnect the water supply: Locate the water supply line connected to the bottom of the tank and unscrew the nut or connector to disconnect it.
Step #3: Remove The Tank From The Bowl:
Loosen and remove the bolts or screws securing the tank to the bowl. Lift the tank straight up and place it on a soft surface to prevent damage.
Step #4: Replace The Overflow Tube And Flush Valve:
Follow the manufacturer’s instructions provided with the replacement flush valve assembly. Remove the old overflow tube and install the new one along with the associated components as directed.
Step #5: Reassemble The Toilet:
Place the tank back onto the bowl and align it properly. Secure the tank by tightening the bolts or screws evenly. Reconnect the water supply line and tighten the nut or connector.
Step #5: Test The Toilet:
Turn on the water supply at the shut-off valve and allow the tank to fill up. Check for any leaks around the overflow tube and other connections. Flush the toilet to ensure it is functioning properly and that the tank refills as expected.
6. A Clogged Vent
A clogged vent can indeed affect the filling of water in a Kohler toilet tank. The vent, also known as the plumbing vent or vent stack, is a pipe that extends from the plumbing system to the roof of the building.
Its primary function is to allow air to escape from the plumbing system. Also, it helps to maintain proper water flow and prevent airlock issues.
However, when the vent becomes clogged, the air is trapped in the plumbing system. Consequently, water flow is slower and the toilet tank is filled longer than usual.
Fixes:
Here are some fixes you can try…
i) Identifying A Clogged Vent:
If you suspect a clogged vent is causing the slow filling of your toilet tank. So, you can start by visually inspecting the vent on the roof. Locate the vent stack, which is typically a small pipe protruding from the roof. Remove the cover or cap if present and inspect the opening.
ii) Clearing The Clog:
If the vent is clogged with leaves, debris, or other obstructions, it needs to be cleared to restore proper air circulation. Before attempting to clear the clog, ensure your safety. Use appropriate ladder safety measures and protective equipment.
iii) Clearing From The Roof:
Using a gloved hand or a suitable tool like a plumbing snake, carefully remove any visible debris blocking the vent opening. Take caution not to push the clog further down the vent or damage the vent pipe itself.
iv) Flushing The Vent:
After removing the visible blockage, you can flush the vent by pouring water down the vent stack. This can help dislodge any remaining debris and ensure a clear path for air to escape. Exercise caution and avoid pouring excessive water that may overflow or cause damage.
v) Professional Assistance:
If the clog is stubborn or difficult to reach, or if you’re uncomfortable performing the task yourself, it is advisable to seek the assistance of a professional plumber. They have the expertise and appropriate tools to safely clear the clog and ensure the vent functions properly.
FAQs:
What Triggers A Toilet To Fill With Water?
The flushing of a toilet triggers the filling of water in the tank. Pressing the flush handle lifts the flapper valve, causing water from the tank to flow into the bowl. Then flush away waste.
How Do I Know If the Water Supply Valve Is Closed?
The water supply valve is usually located behind or near the toilet. Check the position of the valve lever or knob. If it is perpendicular or at an angle to the water supply pipe, it is likely closed.
Can I Manually Fill The Toilet Tank?
Yes, you can manually fill a toilet tank to flush it if the toilet has a gravity-fed flushing system. Remove the tank lid. Pour water into the tank until it reaches the fill line or is about an inch or two below the overflow tube.
How Long Does Toilet Fill Valves Last?
Toilet fill valves typically last around 5 years or longer, depending on factors such as valve quality, frequency of flushing, and water hardness. Over time, fill valves may develop clogs or leaks due to prolonged exposure to water.
Why Is My Toilet Bowl Losing Water But No Leaking?
You may be losing water through capillary action without noticing a leak in your toilet bowl. Another possibility is an improperly sized or clogged drain vent in your home.
Conclusion:
A Kohler toilet not filling can be an annoying issue, but it is often solvable with some basic troubleshooting. By following the steps outlined in the troubleshooting guide, you can identify and address the problem causing the filling malfunction.
Remember to check the water supply, inspect the fill valve, adjust the float, and clean any clogs or debris in the system. To inspect the fill valve, you can check out our detailed guide on Kohler toilet fill valve troubleshooting.
Please let us know if the issue persists or if you have questions about performing the repairs yourself. Restoring proper filling functionality to your Kohler toilet will ensure efficient flushing and a well-functioning bathroom.
About James
James founded HomeUpgradeLab & was sharing his experiences to fix issues related to bathroom and toilet fixtures & fittings. Read to know more about James Hill & how he started this blog.