Did you recently change your shower cartridge to fix the constant water drip that’s been driving you up the walls? Even though your best efforts to fix it, you may be noticing that your shower still leaking after replacing cartridge.
If this is happening to you, don’t worry! You are on the right page to find all the information or solutions you are seeking.
Your shower faucet leaks after replacing cartridge for a variety of reasons, including:
- Hard mineral build-up
- Clogged cartridge or its housing
- The cartridge seals could be too loose or broken
- High water pressure
- Incorrect cartridge installation or the use of an incompatible replacement part for your shower model.

The best way to fix it to clean out the valve inside or flush it thoroughly before installing the new cartridge.
In this helpful guide, we are going to uncover more effective solutions to make sure your shower doesn’t leak anymore.
So let’s get started!!
Table of Contents
Shower Still Leaking After Replacing Cartridge [Quick Overview]
Before heading over to the details, let’s have a short glimpse at all the possible reasons and solutions for this issue through this quick table below:
| Probable Reasons | Recommended Fix |
| Hard mineral building up | Remove the hard mineral stuff with vinegar solutions |
| Dust or particles stuck in the cartridge | Flush out the valve thoroughly. |
| Loose or damaged cartridge seals | Tighten the loose components or replace the worn-out ones. |
| Too much pressure in the water | Adjust the water pressure running through your shower valve |
| Faulty cartridge installation | Check and ensure you’ve installed the cartridge as per the manufacturer instructions |
| Faulty shower valve | Replace the corroded or damaged valve |
| Use an incompatible shower cartridge | Verify the fact and install the right cartridge for your shower model. |
Major Reasons For Leaking Shower After Replacing Cartridge [Easy Solutions]
Now start exploring the details for all the potential reasons behind this issue with the best and easiest ways to resolve them:
1. Hard Water Mineral Build Up Or Corrosion
If your shower still leaks after replacing the cartridge, the best possibility is the problem lies in the entire housing. While dealing with the same issue in my Kohler shower valve, I pulled the cartridge out and noticed a coating of white substance on the brass of the valve body as in the picture below:

This white substance is mainly referred to as “hard water minerals. It is a common circumstance in your plumbing system if you have hard water with mineral content like magnesium and calcium running through your plumbing system.
When the hard water runs through the shower faucet and cartridge, it settles down in the brass body of the faucet. Over time, small bumps and soft spots in the brass wear away due to the constant contact of the highly corrosive minerals and cause water leakage even with the new cartridge.
How To Fix:
Without getting panicked, go through the simple steps below and learn about how you will remove hard white deposits from the cartridge and shower valve:
Step #1: Start by turning off the water supply to your shower faucet.
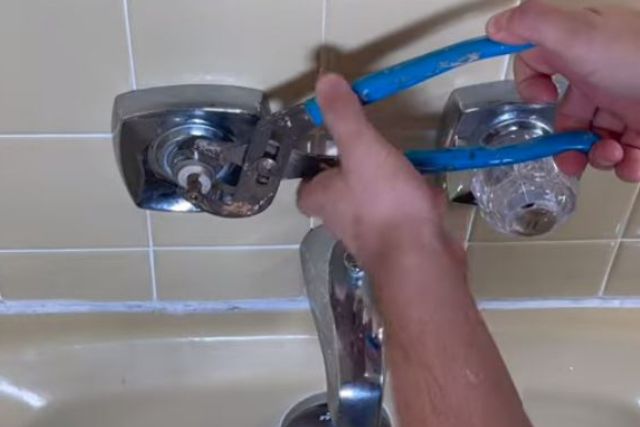
Step #2: Now disassemble the faucet handle and trim to get access to the cartridge.
Step #3: When done, gently pull out the cartridge from the valve body. For instance, you may use a cartridge puller.
Step #4: Take a small container or bowl and make a mixture of white vintage and baking soda.

Step #5: Take a toothbrush or a small brush with soft bristles, dip it into the vinegar solution and gently scrub the mineral deposits from the cartridge
Step #6: Rinse the valve thoroughly with water to remove any remaining vinegar and loosened deposits.
Step #7: Examine the entire valve assembly to see if there are still mineral deposits remaining before reinstalling the cartridge into the shower valve.
2. Clogged Cartridge Or Valve Body
Besides hard mineral deposits, the best possibility is the newly installed cartridge is clogged up with dust, debris, and other contaminants.
If there are foreign particles inside the cartridge or the valve assembly, it is obvious the cartridge won’t seal properly, allowing water to leak when you are turning on your shower.
How To Fix:
Here’s all how you will clean the clogged cartridge:
Before you begin, make sure you have turned off the water supply to your shower faucet. Now, remove the handle and any trim or cover plates from the shower valve.
Inspect the cartridge and the inside of the valve assembly for any dust, debris, or foreign particles that are causing the issue.
If required, use a flashlight and get a clear view of the inside.
If you see any debris or particles inside the cartridge, carefully remove it using a soft brush. Or you may use compressed air as well to blow out any loose particles.
Let me suggest another effective method that I often apply for cleaning the cartridge. For instance:
Step #1: With access to the cartridge, place a container beneath the valve
Step #2: Now turn on the water supply to the shower. It will allow water to flow through the valve and cartridge.

Step #3: Let the water run for a few minutes and flush out any debris or loose particles.
Step #4: Once you have properly cleared the valve and cartridge, reassemble them back to their connections. Turn the water supply back on and check for any leaks.
3. Loose Or Worn-out Cartridge Components
In a typical shower cartridge, you will find several key components that work together to control the flow and temperature of water. That includes the main housing, rubber seal, seal springs, O-rings, bonnet nuts, and hot and cold water inlets.
The cartridge mainly relies on seals and O-rings. The purpose of this seat is to form a watertight seal between the cartridge and the valve assembly.
Now in the case of the newly installed cartridge, you may find that any of the above components become loose or degraded during installation. If that is so, the cartridge won’t create a watertight seal within the valve body, resulting in leaks.
How To Fix:
While it’s relatively uncommon for the seats, springs or O-rings to be damaged right after installing the new cartridge, it is possible. This is most likely related to improper installation or over-tightening or mishandling of the elements.
Whatever the fact is, the time comes to inspect all the internal elements and track down the faults.
But first, make sure you have turned off the water supply to your shower faucet. Now, disassemble the shower handle and reach out to the cartridge. Inspect the seats and springs for loose connections.
If so, use an adjustable wrench and carefully secure them to stop water leaks. Also, verify the O-ring connection and reposition it correctly around the cartridge.

Finally, apply a small amount of plumber’s grease to the seats and springs, it will help to create a watertight seal with the valve body.
In case you find the seats, springs, or O-rings are damaged, nothing but you will need to replace the defective parts.
4. Faulty Cartridge Installation
If you are struggling with replacing seats and springs still leaks, the best chances are you haven’t installed the cartridge as it should. Proper installation is a must to ensure the proper functions of the cartridge and to form a water-tight seal.

While replacing, if the cartridge isn’t seated correctly within the valve body, it won’t create a proper seal, resulting in water leakage.
Here either the cartridge isn’t pushed in all the way or any fasteners like screws or retaining clips are not tightened properly. In most cases, using the wrong parts and missing essential components during installation can also lead to leakage.
Besides, when it is crucial to tighten fasteners and components, at times users mistakenly over-tighten the components which can also distort the plastic or metal components of the cartridge such as threads, seals, or O-rings.
How To Fix:
While installing the cartridge, you need to make sure that the cartridge is aligned correctly with the water supply lines. For instance, it will be highly better to follow the manufacturer’s installation instructions carefully where you will get the recommended tightening procedure for the cartridge.
Next, concentrate on the proper lubrication of O-rings and seals with the plumber’s grease. It is essential as at times inadequate lubrication affects the proper seal and allows water to easily escape.
Most importantly, while inserting the cartridge and tightening the associated elements, make sure you are not giving excessive force there.
5. Incorrect Cartridge Compatibility
While selecting a shower cartridge replacement, it is essential to ensure the right compatibility of the replacement part for the specific shower model and brand. It is even the most common mistake that users make which leads to several plumbing issues including water leakage.
The shower cartridge plays an important role in controlling the water flow and regulating the temperature. Now in case you are installing an incompatible cartridge, it may not align correctly within the valve body, allowing water to leak.
Besides this, you can’t enjoy the constant water flow and temperature as you demand.
How To Fix:
Cartridges come in various shapes and sizes, designed for specific brands. Thus check and ensure you are using the right cartridge for your shower fixture. For instance, check the manufacturer’s documentation that came with your shower fixture manual.
Measure the length and number of splines using a caliper or ruler. Once you have this information, you can easily compare them to references.

If you’re still unsure about all that, it’s a good idea to contact the manufacturer directly. They will provide you with the correct information about which cartridge model is compatible with your shower fixture.
6. High Water Pressure
High water pressure from the water supply lines is another major reason to blame in case you are struggling with a water leakage issue with your newly installed shower cartridge.
If you have high water pressure throughout your home plumbing system, it is really a serious concern as it could lead to plumbing leaks, worn seals, and damaged fixtures.
Several reasons are responsible for excessive water pressure in your house. Like
- Using a faulty water pressure regulator
- Trapped air in the water pipes
- Malfunctions with the water supply valve
- Partial blockages in the plumbing system
Besides, a water hammer in your water pipes can also build high water pressure. Basically, it occurs when the flow of water in pipes suddenly stops or redirects This sudden deceleration creates a shockwave, which results in high water pressure build-up in the plumbing fixtures.
How To Fix:
To deal with the high water pressure in the water pipes, here are a few effective methods to follow:
- Start by inspecting any of the blockages in the plumbing pipes. If so, Use a pipe snake or auger to reach and dislodge the blockage. Simply insert the pipe snake and turn the handle clockwise to pull out the obstruction.
- If you have a water pressure regulator in your home water supply line. Make sure it is adjusted properly. Slightly turn the lock nut counterclockwise to decrease the water pressure. If needed, replace the faulty water pressure regulator.
- If you don’t have a pressure-reducing valve (PRV) on the main water line entering your home, consider installing it to reduce the water pressure to a safe level.
- In some cases, you can install water hammer arrestors on fixtures to reduce the chances of water hammer by absorbing the shockwaves caused by sudden valve closures
7. Faulty Valve Body
While dealing with the same water leakage issue in my shower cartridge, I depth down my inspection and discovered that the problem was actually with the shower valve itself. I found that there were cracks in the valve body that were failing to secure the cartridge as it should.

Basically, the valve body contains seals and gaskets which creates a watertight seal with the cartridge. Over time, like other metallic parts, it is quite obvious corrosion or rust builds up in the valve body itself. These defects easily allow water to escape, leading to leaks.
At times, if the valve is not aligned properly with the plumbing system, it won’t connect with the cartridge as well. This results in gaps that allow water to leak.
How To Fix:
Inspect your shower valve for wear and tear. If you notice cracks or any of the deterioration in the valve body, consider replacing it with a new one. For instance, it will be highly better to seek professional help.
8. Rapidly Fluctuating Water Temperature
Fluctuating the water temperature is another major responsive factor causing the shower cartridge to leak water. When you have rapid fluctuations in water temperature, it creates an expansion in the materials of the plumbing system including the shower cartridge.
At times, this sudden expansion weakens the seals, O-rings, and other major elements of the cartridge that can cause leaks.
How To Fix:
If your newly installed shower cartridge is not providing a water seal from the start, be sure it is time to check the water temperature running through the valve body. If it is rapidly fluctuating, consider installing a pressure-balancing or thermostatic shower valve that will help you to regulate water temperature at a manageable level.
9. Cracked Or Damaged Water Pipes
Last but not least, damaged or cracked water pipes can also contribute to water leakage to your newly installed shower cartridge. If any of the plumbing pipes are damaged or cracked, it leads to sudden fluctuations in the water pressure of the plumbing system.
This sudden build-up of pressure put stress on the shower cartridge, causing it to move slightly within the valve body. As a result, the cartridge won’t seal properly and ultimately develop leaks at the connections.
How To Fix:
Inspect the condition of your plumbing pipes. Check for visible leaks or signs of damage in the pipes. If you find any damaged pipe, you will need to replace it.
Here we will recommend contacting a professional plumber to discuss necessary repairs or replacements.
FAQs:
Can a bad shower cartridge cause low water pressure?
Yes, a bad shower cartridge can cause low water pressure. It occurs if there is hard mineral build-up in the cartridge. Also, damaged internal components or due to incorrect installation of the cartridge cause this issue.
Why is there no hot water after replacing my shower cartridge?
If there is no hot water after installing a new cartridge, the best chances are your cartridge model isn’t compatible with the existing valve. Also, you may have closed the hot inlet or airlock in the shower, leading to this issue.
How to fix low water pressure in my shower?
To increase the water pressure, turn the water supply valve all the way. Check and adjust the water pressure regulator to the increased level. Clean the clogged shower head and replace the old pipes to increase the pressure.
In Closing!
Are you confused about why is your shower still leaking after replacing cartridge? I bet not! By following our guide thoroughly, you can easily fix your shower issues if it is dripping even after your long trying.
While replacing the cartridge, choose the correct replacement part that is compatible with your shower model and fixtures. Besides before setting the new cartridge, inspect the shower valve for the hard mineral and dust buildup. Make sure you have cleaned it properly.
In case you are not experienced enough with plumbing, we will recommend a professional plumber to install the new cartridge.
About Atikul
Atikul Islam shares his expertise with various tips & tricks to fix the problems with home appliances related to toilet, kitchen, bathroom, heating, & cooling systems. Read to know more about Atikul Islam.