The Delta shower cartridge stuck mainly due to corrosion buildup from hard water inside the shower valve. A stuck shower cartridge prevents the shower system from running smoothly. Plus, you might experience water leaking, poor water pressure, and inconsistent temperature control.
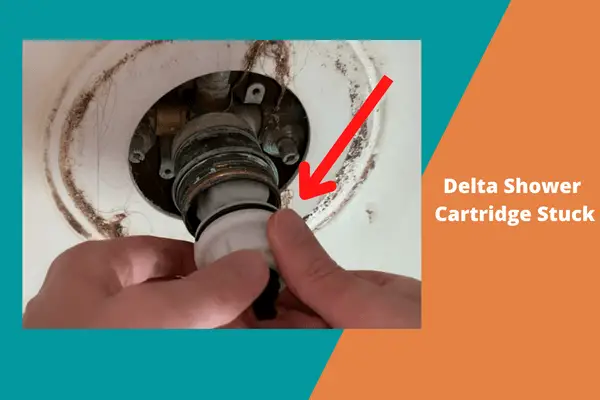
Removing the damaged cartridge and installing a new cartridge on your Delta shower is a simple and affordable way to eliminate all the annoying shower issues.
But the problem starts while removing the hard stuck cartridge, and many of us get into trouble while disengaging it.
Read through the below comprehensive article, where we have covered how to remove the shower cartridge and the needed methods to install the new one. Let’s get started.
Table of Contents
Why Delta Shower Cartridge Stuck [Solved]
Learn all the tips and tricks if the delta shower cartridge won’t come out. But before that, let’s have a glimpse of the reasons why shower cartridges get stuck.
Why Does A Shower Cartridge Get Stuck
Usually, a shower cartridge is fitted with the shower valve with an O-ring. The ring has rubber parts that bind the cartridge.
As you all know, rubber is such a tough elastic polymeric substance that is vulnerable to mineral accumulation. The rubber can easily collect minerals from hard water and other sources, which damages the rubber.
Mineral binds metal and plastic parts of your shower cartridge with the metal of the shower valve. Due to the extreme scale buildup inside the shower valve, the cartridge stuck with the valve stem.
How To Remove A Stuck Delta Shower Cartridge [4 Best Ways]
If your delta shower cartridge ring is stuck by scale buildup, it is sure you have to remove the stuck cartridge. Here, you will need to know some effective methods to soften and dissolve the scale from the cartridge.
For all of your convenience, we are exploring the 4 best and easiest ways that you can apply to remove a stuck Delta faucet cartridge successfully. Here you go!
1. Use a Cartridge Puller
To simplify the stuck shower cartridge removal task, you can use a cartridge-puller tool. The puller is an essential plumbing accessory that is designed to remove cartridges from the shower valve.
This T-shaped cartridge-puller will easily disassemble the faucets and extract shower valve cartridges. You can buy a cartridge replacement kit where you will get a cartridge puller in the package.
Anyway, get a puller and start removing the cartridge that is stuck in place.
Follow the below methods:
i). Exposing The Faucet Cartridge
Before proceeding with the removal process, you have to turn off the main water supply line. Run a faucet and ensure that the water is turned off.
Then, remove the faucet handle. You will find hex bolts beneath the handle cap. Remove the bolts using an Allen wrench to free the handle.
Once the hex bolts are removed, pull the handle off using a flathead screwdriver. It will help to pry off the handle. Pull out the trim sleeve or plate by hand as well. The trim plate may be mounted with the screw.
Now, you will find a bonnet nut holding the cartridge in place. Remove it with an adjustable wrench or by hand if you can.
ii). Attach The Cartridge Puller
Once the bonnet nut is removed, the Delta shower cartridge can be accessed. Now take the Delta cartridge puller and slide it onto the end of the cartridge.
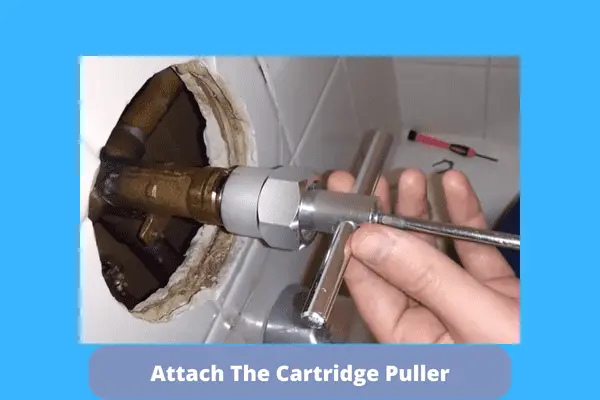
Check the alignment of the cartridge by the position of the two tabs. The tabs will straddle the cartridge’s raised center, ensuring the tool fits snugly.
Now take a screwdriver and tighten the puller screw all the way in. If the screw is not driving all the way in, back the screws out and realign the puller with the tabs. Then again, start turning the screw on the puller until it stops.
iii). Remove The Cartridge
After screwing, start twisting the puller back and forth. Continue to twist it left and right inside the shower valve until the cartridge will free up to pull out easily.
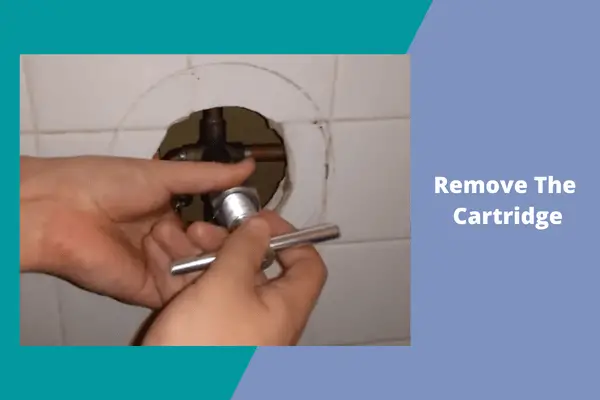
Then try to pull the puller away from the cartridge to disengage it from the shower valve.
2. Heat The Cartridge With A Hairdryer
Heating the cartridge with the hairdryer will also show enough effectiveness in the case of the delta shower cartridge not coming out or getting stuck.
Applying the heat with the hair dryer for about 10 to 15 minutes will loosen the cartridge and make it easy to pull out.
Follow the instructions below on how to use this heat application to detach the cartridge.
- Connect the hairdryer and connect with the power connection. Put it in the highest temperature settings. Now start running the hair dryer over the cartridge. Keep blowing the hot air for 10 to 15 minutes.
- After 5/10 minutes, the stuck cartridge will be loosened. Put the hairdryer away from the cartridge. Now, insert the puller and set it to the end of the cartridge. Grab the handles of the puller and twist them right and left.
- If you find it hard to rotate the cartridge even after the heat treatment, apply more heat. Once the cartridge feels free to come out, pull the puller away from the cartridge with the pliers.
3. Drench The Cartridge With Vinegar Or WD-40
Dousing the material with vinegar is an effective way to loosen the corroded connections of any material.
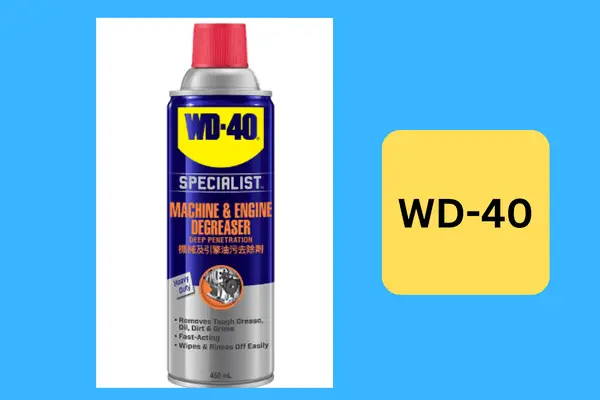
The vinegar is acidic enough to dissolve rust from the metal parts. WD-40 is also great for loosening and removing excessive metal corrosion.
Anyway, we can apply both of the solutions to remove a stuck cartridge. For instance:
- Take a spray bottle and put WD-40 or vinegar in the bottle. Spray the solution all over the cartridge. Leave the cartridge drenched with vinegar for an hour.
- It will penetrate the cartridge stuck cartridge part. You need to spray after every 10 minutes. Once the cartridge seems loose, use a puller and twist it to free up the cartridge.
4. Thread The Cartridge Sleeve With A Tap
If you have applied all the above methods and still the cartridge is stuck, you can do one more thing. Sometimes, the old cartridge is tightly held inside the valve housing with the sleeve. Pulling it out using a tap will work.
As the inside of the cartridge sleeve is made of brass, you can thread it easily using the tap. This may damage your shower cartridge and even the valve.
- First, take a ½-inch tap and start drilling threads into the top of the cartridge sleeve. You need to drill thread halfway into the cartridge sleeve. Once you thread through the sleeve sufficiently, you will hear squeaking, ensuring you can grab the cartridge tightly now with a bolt.
- Get a 1/2-inch bolt, two nuts of the same size, and some washers. First, screw the 2 nuts to the middle of the bolt all the way in. Then slide the bolt into the washers. After that, screw the bolt inside the cartridge and turn the bolt until it is tightened.
- You can use a wrench and keep tightening the bolt until you completely push the washers against the valve housing. This pressure of the shower and bolt will pop out the cartridge from its place. Then you can pull out the cartridge sleeve with ease.
How To Replace Delta Shower Cartridge [7 Steps To Follow]
You might notice a leak from the shower valve while taking a shower. A broken shower cartridge is the culprit, as it can cause rust and erosion behind your shower valve.
The only way to get out of this trouble is to replace the broken shower cartridge from the shower valve. No fear, follow the below-assigned step-by-step guide to replacing stuck delta shower cartridges.
Step 1: Collect The Needed Tools & Materials
Before beginning the project, collect the below-listed tools:
- Drop cloth
- Screwdriver set
- Cartridge puller tool or adjustable pliers
- Allen wrench
- Caulk or plumber’s grease
- Paper towel
- Needle-nose pliers.
Step 2: Shut Off The Water Supply
You have to shut off the main water supply line. Once you shut off the main water line, run the faucet for some time to let the remaining water in your pipes drain and relieve pressure.
Then, put a drop cloth in the shower or tub to prevent the drain from blocking off.
Step 3: Remove The Shower Handle
In this step, you have to access the shower valve. So, it is necessary to remove the shower handle from its place. Use a flathead screwdriver and pry the plastic cap off the shower handle.
If your shower has a single-lever handle attached with a small set screw in the handle, remove it with an Allen wrench. Then pull off the handle. Once the handle is removed, set it aside.
Step 4: Unscrew The Trim Plate
The trim plate is a ring or sphere-shaped metal that sits behind the handle and covers the hole in your shower’s wall. The trim plate might be attached with a few screws to the valve assembly.
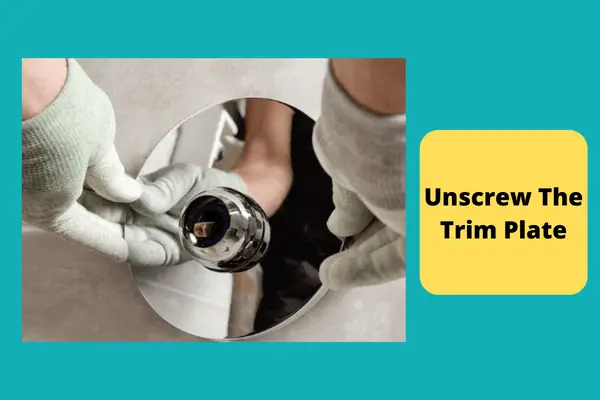
Take a screwdriver and loosen the screws. Once unscrewing the screws, slide the trim plate off the valve stem.
Step 5: Remove The Retainer Clip
You will find a metal retainer clip inserted through the top of the shower valve and the shower cartridge in place.
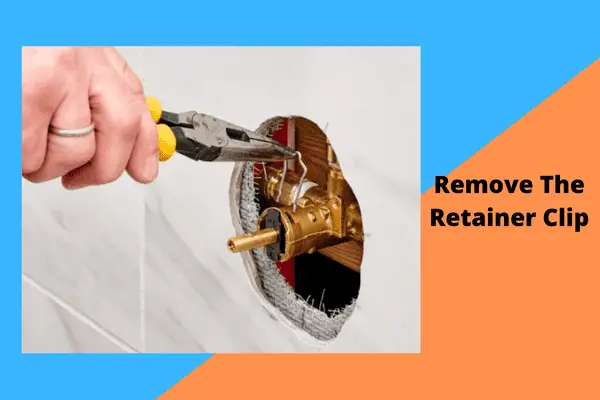
To unhook the clip, use a flathead screwdriver or needle-nose pliers. Then set it aside in a secure place.
Step 6: Remove The Shower Cartridge
This is the time you have to remove the stuck shower cartridge. Take a puller tool and hook it onto the edges of the cartridge. Once the cartridge is loosened, pull it out from its position.
If the cartridge is stuck and seems hard to pull, use WD-40 or vinegar to loosen the corroded cartridge. We have outlined the cartridge removal process in detail.
Step 7: Install the New Shower Valve Cartridge
With the old cartridge out, it is time to install the new cartridge. Slide the new cartridge into the correct place and secure it with a retainer clip.
Use the plumber’s grease over the surface of your new shower cartridge to prevent corrosion. Re-install the trim plate and screw the shower handle back on. Turn on the water supply line and test your work.
FAQs:
How do I loosen a tight shower valve?
To remove the shower valve, you need to pull it. If the handle stuck, you can add lubrication to loosen the stuck. Then, pry the handle with a flat-head screwdriver.
How do I remove a cartridge retaining nut?
You will find a retaining nut behind the shower handle and a flat metal plate. Use needle-nose pliers to unhook the nut.
Is it possible to replace the shower cartridge without turning off the water?
You can replace the shower cartridge without turning off the water only if your shower valve has a cold and hot water shut-off valve. In the case of the water supply from the main line, you need to turn off the entire house’s main water line.
At The Bottom Line
Are you still struggling to pull out your Delta shower cartridge but failing to budge? Hopefully not. Our above-assembled guide is enough to make removing the shower cartridge tasks easier.
Still, if you are facing any trouble, feel free to ask us in the comment box. We will get back to you with the best solutions.
Note: You can also read our guide on why low water pressure after replacing the cartridge.


About James
James founded HomeUpgradeLab & was sharing his experiences to fix issues related to bathroom and toilet fixtures & fittings. Read to know more about James Hill & how he started this blog.