You can’t deny that Delta showers are truly long-lasting and performing bathroom accessories. Even so, some problems might occur while using an old or brand-new Delta shower faucet. One of the most common things that you’d notice is the Delta shower faucet dripping after getting old.
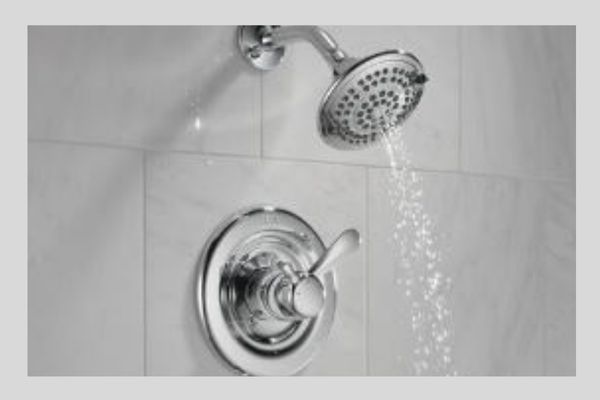
We think it’s because of either worn-out cartridge seats or loosely connected shower kits. If it’s because of the bad seats in the valve, you can solve it by spending merely 2$. But sometimes, the cause can be huge and hard to solve. For example, corroded metal or rubber stops the handle from closing properly.
Whatever the reason is, you can’t go to a conclusion so easily. Thus, we’ve figured out how you can deal with the dripping shower faucet precisely.
Table of Contents
Delta Shower Faucet Dripping [Reasons + Solutions]
If you see the delta one-handle shower faucet dripping constantly, most of the time, you need to consider the main control valve at fault. Because the gateway of water in the shower system is basically controlled by the handle, cartridge, and valve.
So, here are 8 key reasons why you can see delta one handle shower faucet dripping even after turning the knob.
1. Handle Screw Loose or Broken
Let’s ask you a question, why your Delta shower keeps dripping? The first answer that’d come into your mind is when the shower isn’t turned off properly, it’d keep dripping water.
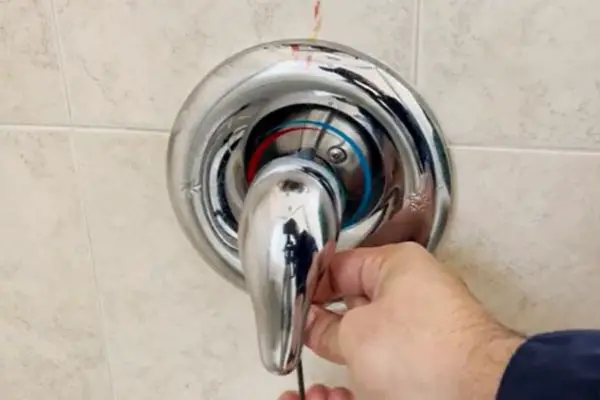
So, the first thing you need to check in this troubleshooting method is to investigate the condition of the handle and the handle screw. Normally, a handle that’s loose or doesn’t work properly, can’t shut off the water supply completely.
Solution:
Follow these suggestions to fix this issue:
i) Tighten The Handle:
The handlebar or knob of your shower faucet has a mother screw that keeps the construction attached to the system. Most of the time, it stays under the bar or beneath a nickel plate on top of the knob.
You can use a screwdriver or L-shaped Allen wrench to tighten the screw if the handle seems loose to fail in closing the water gateway.
ii) Replace The Handle:
Next, if the screw is tight, then try turning the knob or handle both ways to see whether the movement seems loose or not. A handle with threads stripped or corroded can cause some failures. In that case, try using plumbers’ tape to tighten the threads or replace the handle set as soon as possible.
Note: Sometimes, overtightened handles can also make the Delta monitor shower faucet dripping. So, you better make sure the handle isn’t too tight to turn.
2. Excessive Water Pressure
The ideal water pressure for residential space is not more than 60 PSI. Extra water pressure can make water come out from different outlets in your home even when the valves are off.
Solution:
The following suggestions will help you resolve this problem:
i) Balance The Water Pressure:
With the main water motor of your house, there’s the main valve controlling water pressure. See if it’s on the right PSI scale. If not, turn it around and keep it between 40 to 60 PSI.
ii) Use A Professional Kit:
But when there’s no scale marked on the valve, take a PSI meter and measure the water pressure of your home and change the valve position accordingly. You can also hire a plumber only to measure the water pressure with his professional kit if you want. It won’t cost you much.
3. Misplaced Anti-Scald Device
Usually, people think that only the threads in the shower handle fix the direction of movement for the knob. But actually, there’s an anti-scald device or limiter right over the cartridge and beneath the handle to limit the handle movement.
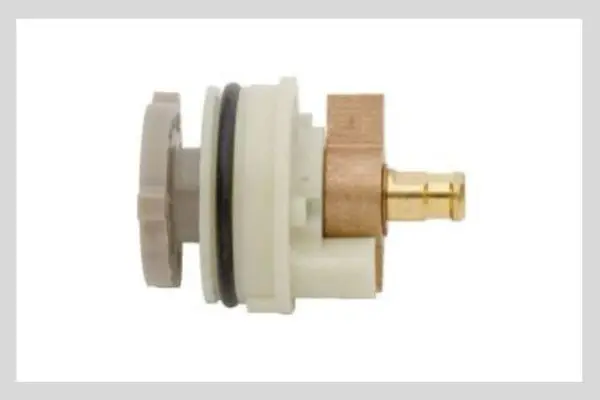
While installing the handle or cartridge in the past, you might’ve placed the limiter in such a way that it stops the handle from shutting down the shower water line completely. When you’re seeing both your handle and the water pressure is fine, you better think of looking inside the handle once.
Solution:
Here are some steps that will help you solve this problem:
Step- 1: As mentioned in fact #1, there’s the main screw that you need to find for removing the handle. After removing the handle you could see a white plastic object just on top of the cartridge.
Step- 2: Twist the limiter rightwards so that the handle can be moved clockwise more than before.
Step- 3: After that, reattach the handle again and see if turning off the handle stops the water from dripping completely. If so, then your work is done.
4. Old Cartridge Seats
If you haven’t found anything wrong from the outside, it means something’s wrong inside, especially with the cartridge. The first thing that you need to notice is the washers or seats that directly get in touch with the path of water.
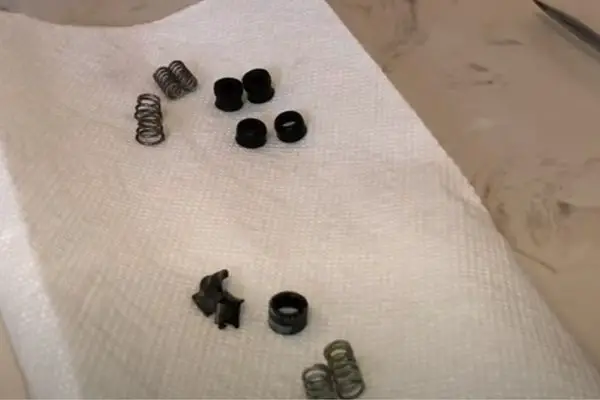
The Delta shower cartridge leaks when the rubber cartridge seats, like O-rings, wear out. The problem worsens if the springs under the washers lose their elasticity, leading to improper water control and continuous water flow from the faucet.
Solution:
If you have trouble resolving this issue, you can follow these steps:
Step- 1: First of all, turn off the water supply. Then, find the mother screw of the handle and remove it as described in the above point.
Step- 2: Take off the handler collar and silver plating from the wall to reveal the cartridge completely. You can either use a cartridge-removing driver or bare hands to bring out the cartridge.
Step- 3: Now, inspect the bottom of the cartridge. The two black O-rings are the seats we’re talking about. If they seem to be in bad condition, then replacement is mandatory.
Step- 5: In the market, you’d find cartridge seat kits costing not more than 2-3$. Purchase a kit that matches your cartridge model. Follow the instructions in this video and replace the old seats.
Step- 6: At last, put everything back in the right locations.
5. Broken Washer
The most common cause of a dripping Delta shower faucet is a broken washer. Washers are small rubber or silicone discs that rest against the valve seat inside the faucet.
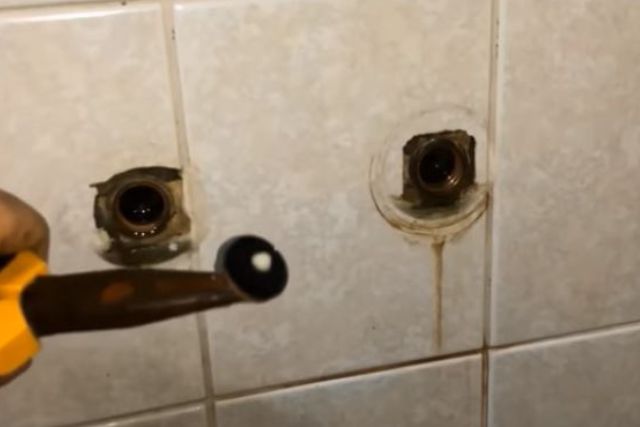
Most of the time, the constant friction between the washer and the valve seat can cause the washer to wear out, resulting in leaks. If the washer is of the wrong size or not installed properly during installation or maintenance, it can also lead to a dripping faucet.
Solution:
To fix a dripping Delta shower faucet caused by a broken washer, you will need to replace the washer. Here’s a step-by-step solution:
Step- 1: Make sure your shower shut-off valve is turned off before you begin working on the faucet.
Step- 2: Use a screwdriver or Allen wrench (depending on the type of handle) to remove the screw holding the handle in place. Once the screw is removed, gently pull the handle away from the wall to expose the cartridge or stem assembly.
Step- 3: Depending on the Delta faucet model, you may need to remove additional parts to access the cartridge or stem assembly. Follow the manufacturer’s instructions or consult the user manual for your specific faucet.
Step- 4: Once you have access to the cartridge or stem assembly, you will see the washer located at the base. Carefully remove the old washer and replace it with a new one of the appropriate size and type. It’s a good idea to bring the old washer with you to a hardware store to ensure you get an exact match.
Step- 5: After replacing the washer, carefully reassemble the faucet, following the reverse order of the disassembly steps. Make sure all parts are securely tightened.
Step- 6: Once everything is reassembled, turn on the water supply by opening the shut-off valve. Check for any leaks and ensure the faucet is functioning properly.
6. Malfunctioning O-Ring
The O-ring is a small disc-shaped rubber or silicone ring that is located in the faucet, specifically around the stem screw that holds the handle in place. It helps to create a watertight seal and prevents water from leaking out of the faucet. When the O-ring can wear out or become loose, leading to leaks.
Solution:
If you have a dripping Delta shower faucet caused by a faulty O-ring, you will need to replace it. The solution is as follows:
Step- 1: As you work on the faucet, locate the shut-off valve for your shower and shut it off.
Step- 2: To remove the screw holding the handle in place, use an Allen wrench or screwdriver. After removing the screw, carefully pull the handle away from the wall to expose the cartridge.
Step- 3: Depending on the Delta faucet model, additional parts may need to be removed. Refer to the manufacturer’s instructions or consult the user manual for your particular faucet.
Step- 4: Look for the O-ring around the stem screw. Carefully remove the old O-ring and replace it with a new one of the same size and type. You can find replacement O-rings at hardware stores or plumbing supply stores.
Step- 5: Replacing the O-ring requires reassembling the faucet in reverse order. Ensure all parts are properly tightened.
Step- 6: As soon as everything is reassembled, open the shutoff valve to turn on the water supply. Make sure the faucet is not leaking and that it is working properly.
7. Damaged Valve Cartridge
If nothing works, then there’s only one thing left for you to do, replace the old shower cartridge. Because no matter how bad the showerhead or water line is, the shower won’t drip water unless there’s any issue with the shower handle cartridge.
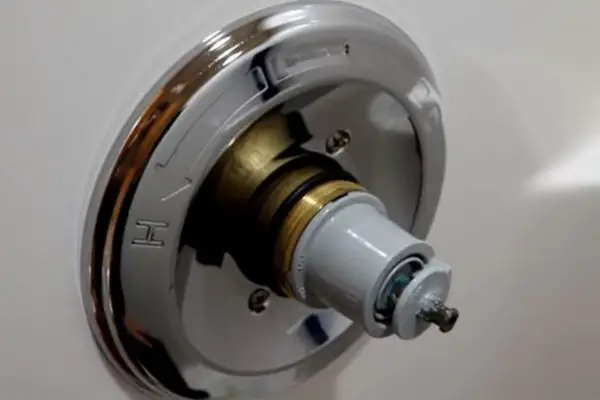
A bad shower cartridge can’t control or limit the flow of water in the shower. The failed cartridge can either be fouled by corrosion or broken due to overuse till the present.
Whatever the reason is, your damaged shower cartridge won’t completely block the water when the handle is turned off and the water would keep coming out from the shower faucet.
Solution:
Here are steps you can take if you are facing resolving this issue:
i) Follow The Instructions:
We’ve already mentioned how you can put off the shower handle and other accessories from the main line and wall. Follow the same instruction to separate the handle first.
ii) Clean the old cartridge
To clean the old cartridge, remove it from the faucet and gently wipe away any dirt or debris using a soft cloth. Soak the cartridge in a mixture of equal parts vinegar and water for about an hour to dissolve mineral deposits. Rinse it thoroughly with water and reassemble it back into the faucet.
iii) Replace The Old Cartridge:
The following steps will help you to replace an old cartridge:
Step- 1: Disconnect The Water Supply:
Make sure the water shut-off valve for the shower is turned off and that there is no water flowing while the repair is being completed. If you can’t find a dedicated shut-off valve for the shower, you may need to turn off the main water supply to your home.
Step- 2: Remove The Handle:
In order to remove a Delta faucet’s set screw, you may need to pry off the decorative cap on the handle. After loosening the handle, pull it straight out.
Step- 3: Remove The Trim Sleeve
Some Delta shower faucets have a trim sleeve that covers the valve cartridge. If your faucet has one, carefully unscrew and remove it.
Step- 4: Remove The Cartridge
The cartridge is the heart of the faucet and controls water flow. Delta faucets typically have a cartridge that can be removed by twisting it counterclockwise.
Use a cartridge removal tool or pliers to grip the cartridge and turn it. If it’s difficult to remove, you may need to apply some penetrating oil to loosen it.
Step- 5: Inspect the cartridge
Examine the cartridge for any signs of damage or wear, such as cracks, tears, or mineral buildup. If you notice any problems, it’s best to replace the cartridge with a new one.
Step- 6: Replace The Cartridge:
If you need to replace the cartridge, obtain a compatible replacement from a hardware store or directly from Delta. Insert the new cartridge into the valve body and twist it clockwise until it’s firmly seated.
Step- 7: Reassemble The Faucet
Reverse the steps you took to disassemble the faucet, starting with reattaching the trim sleeve (if applicable) and then sliding the handle back into place. Make sure the handle is aligned correctly and secure it with the set screw or by reattaching the decorative cap.
Step- 8: Turn on the water supply
After reassembling the faucet, turn on the water supply and check for leaks. To check that the faucet is working properly, turn on the shower if there are no leaks.
iii) Seek Professional Help:
You need to seek help from a professional to know what’s exactly going wrong with the shower faucet. We think the best thing even a plumber could do then is to replace the old shower set.
Essential Note:
Don’t be hasty while replacing the shower cartridge, you might end up damaging the new one. The procedure to replace the old cartridge is almost the same as the method to bring out the shower cartridge that we discussed a while ago.
The additional thing here is you need to install the new cartridge back in the valve instead of the old one and put everything back like before. You can also watch the below video if you have any doubts in your mind regarding the matter.]
FAQs:
Is it normal for the shower head to drip after a shower?
Yes. The water remaining in the shower head and pipe after turning off the handle would come out for a while. It’s nothing related to the real water-dripping issue.
How much does it cost to fix a leaky showerhead?
You need to spend around $100-200 depending on the actual issue behind the leakage in the shower head. But the cost might rise when something needs to be replaced.
How much does a plumber charge to replace a shower faucet?
The cost of hiring a plumber nearby is not more than 100 bucks. As replacing the shower head takes nearly a couple of hours, plumbers won’t charge cheaply.
How difficult is it to replace a shower faucet?
Replacing a shower faucet isn’t a big deal if you know the right way. But the main thing you need to have for plumbing jobs is patience. You should keep at least a couple of hours in your hand when you’re about to change your old shower faucet.
Summary
Water dripping from faucets and showerheads even after turning off the handle is a very common issue. Every day, lots of water gets wasted because of this problem. And this can make you suffer when the water level under the ground gets lower in the summer times.
Thus, you better take the matter seriously and take every necessary action required to solve this matter. You can easily stop the Delta shower faucet dripping when you follow our guide step by step.
Also, make sure you take some action before such a problem arises again in the near future. We’d be happy to help you in this matter in more detail. So, don’t forget to reach us if needed.

About James
James founded HomeUpgradeLab & was sharing his experiences to fix issues related to bathroom and toilet fixtures & fittings. Read to know more about James Hill & how he started this blog.