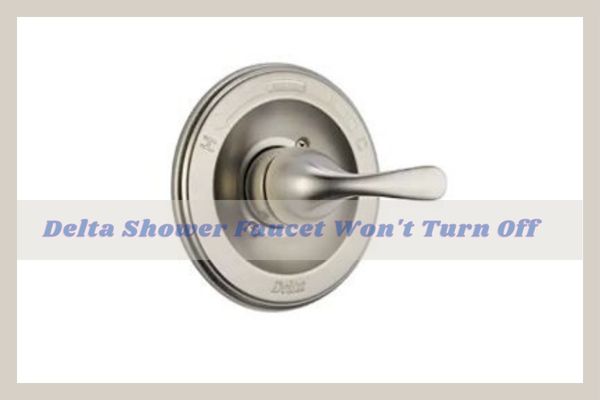
Delta shower faucet won’t turn off mainly due to the worn-out shower faucet’s cartridge. Replacing the defective cartridge is the most straightforward solution for a faulty faucet that isn’t turning off all the way.
If the shower won’t turn off after replacing the cartridge, a loose faucet handle or sometimes mineral deposits in the system is the culprit. Plus, defective Delta faucet seats and springs are also one of the leading responsive factors for this issue.
Stay tuned with this article till the end to get a well-proven troubleshooting guide to fix your shower faucet that keeps running water.
Table of Contents
Why Delta Shower Faucet Won’t Turn Off [Reasons + Solutions]
Let’s have a glimpse at the below table highlighting all the probable reasons with the corresponding quick fixes behind a leaky Delta shower faucet:
Note: You can also read how to fix the Moen shower faucet that won’t turn on.
Probable Reasons | Possible Solutions |
| Loose shower faucet | Tighten the shower handle screw |
| Cracked shower faucet handle | Replace the cracked handle |
| Broken cartridge | Replace the bad cartridge |
| Deteriorated Faucet Seat & Springs | Check & replace the damaged valve adapter set |
| Mineral deposits in faucet parts | Clean the clogged faucet parts |
Does It Matter If A Shower Won’t Turn Off
In most cases, you may face that your shower faucet is dripping water even after you have turned off the water. A leaky shower is never normal and a good thing.
According to the EPA (Environmental Protection Agency), a leaking faucet is the most prominent plumbing issue. Also, more than 3000 gallons of water are wasted through a leaky faucet that drops just one drip per second.
So, you need to take immediate action to resolve such an issue in your house. Not only, the matter is likely related to the annoying dripping sound, but also it affects in many ways.
Like, a leaking faucet can easily lead to high water bills. As increasing the utility bill, you have to pay an extra amount which is sure to be not good for you.
In another case, if you are ignoring your shower faucets that aren’t turning off, it can cause further significant damage, like putting extra wear and tear on your faucet. Also, by neglecting the problem, wasting lots of water is obvious, which is harmful to the environment.
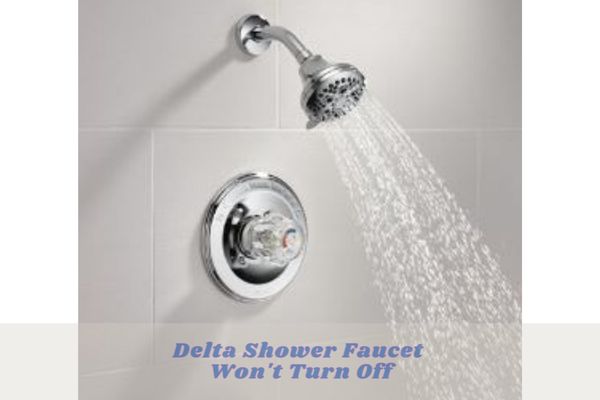
How To Fix A Leaky Delta Shower Faucet
Here we have explored all the responsive factors behind a leaky faucet, inducing step-by-step directions on how to resolve this problem. Scroll down!
1. Loose Shower Faucet
When your delta shower faucet is not turning off, be sure the loose shower faucet can be one of the big reasons here. There is a screw underneath the cover plate that attached the handle to the wall.
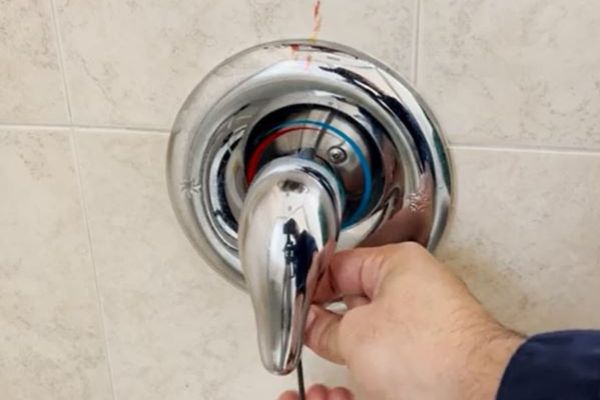
At times or after years of usage, the screw on the cover plate might be loosened, which is why you may experience shower water leaks.
So, starting troubleshooting by tightening the shower faucet is the simplest hack to recover from the issue.
Solutions:
As the screw is covered underneath the cover plate thus, you won’t see the handle screws at first glance. You have to undo the faceplate first.
Take a flat-blade screwdriver and then pry underneath the faucet cover plate. Look at the cover plate’s backside and locate the screws connecting the handle. Once the faucet’s handle screw is revealed, tighten the handle screws using a Phillips screwdriver.
2. Cracked Or Broken Shower Faucet Handle
If your delta shower won’t turn off even after tightening the handle screws, it is a higher possibility that the issue is related to the faucet handle. Many times, the handle gets cracked and broken, but we can’t notice it.
The inside of the shower faucet handle is connected to the faucet stem. When you turn on the handle, the stem allows water to flow up through the shower faucet.
But if the handle is broken, it will fail to grip the stem and lead to the water leaking from the shower.
So, in this troubleshooting stage, you need to disassemble the handle from the faucet and check for any cracks and damages.
If yes, replace the cracked handle to resolve the water leaking issue.
Solutions:
Below are quick steps to replace the delta shower handle:
- Before starting, turn off the water supply. Then you will need a flat-blade screwdriver and use it for popping off the cap or cover plate of your shower handle.
- Once the cover plate comes out, you will see a screw in the middle of the handle, as you have read in the above section. Now, take a Phillips screwdriver and take the screw out from the attachment.
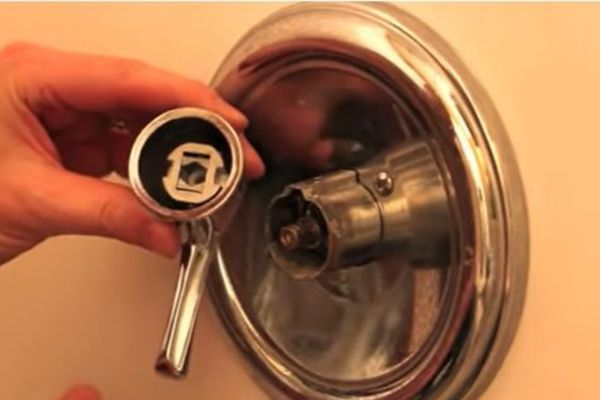
- Then, grab the handle and pull the handle off toward you. After removing the handle, you will find a sleeve over the shower valve, as shown in the picture.
- Pull out the sleeve as well. Next, you will need to take off the hot and cold plates by unscrewing the two screws. Then, remove the plate from its place. You can use a screwdriver to pry off the plate from the wall.
- Now it’s time to install the new handle. First, put the rubber ring which will hold the sleeve into place and push the sleeve over it. Next, take the new hot and cold plates and connect the screws tightly.
- Place the new handle and secure the screws of the handle. Put the handle cap back on. That’s all you have done!! Turn on the water supply and test the shower.
3. Bad Shower Cartridge/Valve
A damaged shower cartridge is the major sign in the case of the “shower turned off, but water still running.”

A cartridge is an essential device of the shower valve assembly which controls the amount of cold or hot water running through the faucet. But if the cartridge is worn out or broken, it fails to regulate the water while you are operating the handle.
As a result, the water will not turn off, leading to the leakage issue. So, as a fix, you need to replace the damaged cartridge
How To Replace Delta Shower Cartridge
Follow our below assigned step-by-step guide to make the replacement of the cartridge easier for you:
i). Turn Off Water Supply & Close The Shower Drain.
Before starting anything, turn off your main water valve. Here, you may need to shut off the water supply to the entire house. Then cover the drain to make sure that you don’t inadvertently drop any parts down the drain.
ii). Remove The Shower Handle
Remove the handle cover and loosen the set screws of the handle using an Allen wrench. Then remove the handle. Pull out the trim sleeve.
iii). Remove The Trim Plate & Release The Valve Ring
After removing the shower handle, unscrew the trim plate that is attached with a few screws to the valve assembly. Then you will see the cartridge, which is held in place through a valve ring. Use the Allen wrench to take the valve ring off and set it aside.
iv). Pull The Valve Cartridge
This time, you have to remove the shower cartridge. Grab the cartridge and pull it towards you. It might be stuck in the valve assembly. In this case, use a puller tool to loosen the corroded cartridge.
v). Install The New Cartridge
Take the new cartridge and slide it into the valve assembly. Make sure you are placing the hot and cold sections of the cartridge line up in the right way.
Once you’ve done this, reassemble the valve parts back in place. Ensure a secured connection of all the parts. Finally, turn the water back on and test your shower.
That’s all you have done! Contact any certified plumber to fix replaced Delta cartridge faucet that won’t turn off.
4. Deteriorated Faucet Seat & Springs
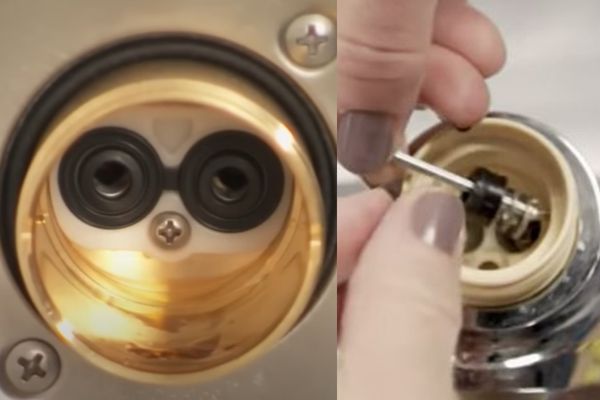
If you have a Delta 17 series shower faucet, the shower valve assembly features an adapter behind the cartridge at the bottom of the valve. The adapter contains seats and springs, which look as shown in the picture.
If your shower faucet is leaking even after ensuring a secured shower handle, the problem is most likely related to the worn-out seats and spring.
So, now you will need to check and replace the damaged adapter set to fix the shower leaking issue.
Solutions:
Follow the below quick steps to replace the damaged seats and seals from the shower valve:
i). De-assemble The Shower Valve Assembly:
Before starting anything, make sure you have turned off the water supply. Then, pry off the cover plate of the shower handle and locate the screws.
Unscrew the screws holding the handle in place, and then pull out the handle from the valve assembly. Pull off the trim sleeve as well.
ii). Remove The Cartridge:
You will find the valve cartridge, which is held in place by a bonnet nut. Remove the bonnet nut using s strep wrench and set it aside. Grab the cartridge firmly and pull the cartridge out by wiggling it back and forth.
iii). Detach The Old Adapter Set:
After the cartridge has been removed, you will see the adapter containing seats, springs, and quad seals. Take an Allen wrench or screwdriver to reach in and slide the quad seals out. In the case of worn-out parts, you need to replace them.
iv). Install The New Adapter Set:
Take the new quad seals set and install it first at the place. Next, place the new seats and then spring in a large out over the Allen wrench.
Then, slide the wrench into the open side of the adapter. Apply some pressure to push the parts in place. Now install the other side the same way. If you feel okay, you can replace the complete adapter.
Anyway, finally reassemble the cartridge, trim sleeve, and handle. Replace the cartridge as well if you find it damaged. Make sure you have chosen the right replacement cartridge for the 17 series.
5. Clogged Faucet Parts
In most cases, the shower leaks water only due to building up mineral deposits on the faucet parts. Here, only unclogging the deposits from the parts will effectively work rather than replacing them.
For this, you need to take apart the shower faucet to inspect the internal parts. For the longest usage, you will find buildup mineral deposits, grease, and grim on these.
So start cleaning by following the below cleaning tips:
Methods 1: Soak In Vinegar
Vinegar is an acetic acid content that is effective enough in household metal cleaning. It easily removes stains and breaks down grease and grime from the metal parts. Soak the faucet’s plastic or metal parts in white vinegar for 3 to 4 hours to break down grime and mineral deposits.
Method 2: Clean With A Soft-bristled Toothbrush
You can rub the metal parts with a soft-bristled toothbrush or paintbrush. Here, you can use a foaming cleanser for better cleaning.
Make sure you are not using harsh or abrasive cleaning agents or tools while cleaning. Then, wipe the parts with a soft cloth dampened with hot water.
Method 3: Clean With Lemon Solution
It is another effective cleaning procedure to break down mineral deposits. For this, take lemon juice and mix it with half a cup of warm water.
Now, take a sponge or toothbrush and dip it in the solution. Then start rubbing the internal parts of your shower head. Finally, rinse and wipe down the parts to remove traces of the lemon.
Tips To Maintain Your Shower Superexcellent
A shower is an essential part of our bathroom. With the proper maintenance of this part, you can enjoy the most comfortable bath without any trouble. But many of us still wonder how to ensure the best care of the shower in our house.
For their convenience, we are including some must-have maintenance tips, which you can do with minimal effort.
- To keep the shower always functioning, you have to care for the cleanliness of the shower first. Rinse the shower after every bath to prevent building up gunk and grime.
- Never use bleach or any abrasive cleaners while cleaning, as it may damage the shower’s internal parts.
- You can fill a plastic bag with white distilled vinegar and tie the bag around the shower head. Leave it for hours. This will assist in dissolving the build-up deposits from the shower head.
- After taking a shower, keep your shower door open for some time. It will help to disperse the leftover humidity that is trapped in the shower.
- That’s because humidity may lead to rust in your iron-containing shower metals.
- If you are facing any major shower problem beyond repair, it is better to contact a trusted plumber to take over the task.
FAQs:
Is there a shut-off valve for the shower?
No, there is not any shutoff, especially for only a shower. The shutoff valves for the complete toilet will be underneath the sink in the cabinet area. Also, it might be located near the main shutoff valve for the house.
How can I turn off the shower with broken handles?
If the shower knob is broken, you can shut the shower from the closest available shutoff. Just locate the water shutoff valve and turn it clockwise to shut off the water supply line for the house.
Bottom Lines!
Well!! We are at the end point of our discussion. Hopefully, this was an easy read for you to learn how to resolve the Delta faucet won’t turn off issue. By following our guide, you can easily fix the problem of your shower like a professional.
Still, if you will face any troubles while resolving the issue, don’t be late to let us know through comments. We are always here for you. You can also read our guide on why the delta shower cartridge is stuck and how to fix it.
About James
James founded HomeUpgradeLab & was sharing his experiences to fix issues related to bathroom and toilet fixtures & fittings. Read to know more about James Hill & how he started this blog.